Dessert lovers rejoice as this classic cream cheese pie recipe promises pure indulgence with every creamy bite.
Smooth, rich, and utterly decadent, this pie blends traditional flavors into a mouthwatering masterpiece that melts on your tongue.
Generations of home bakers have perfected this delightful treat, passing down secret techniques that make each slice extraordinary.
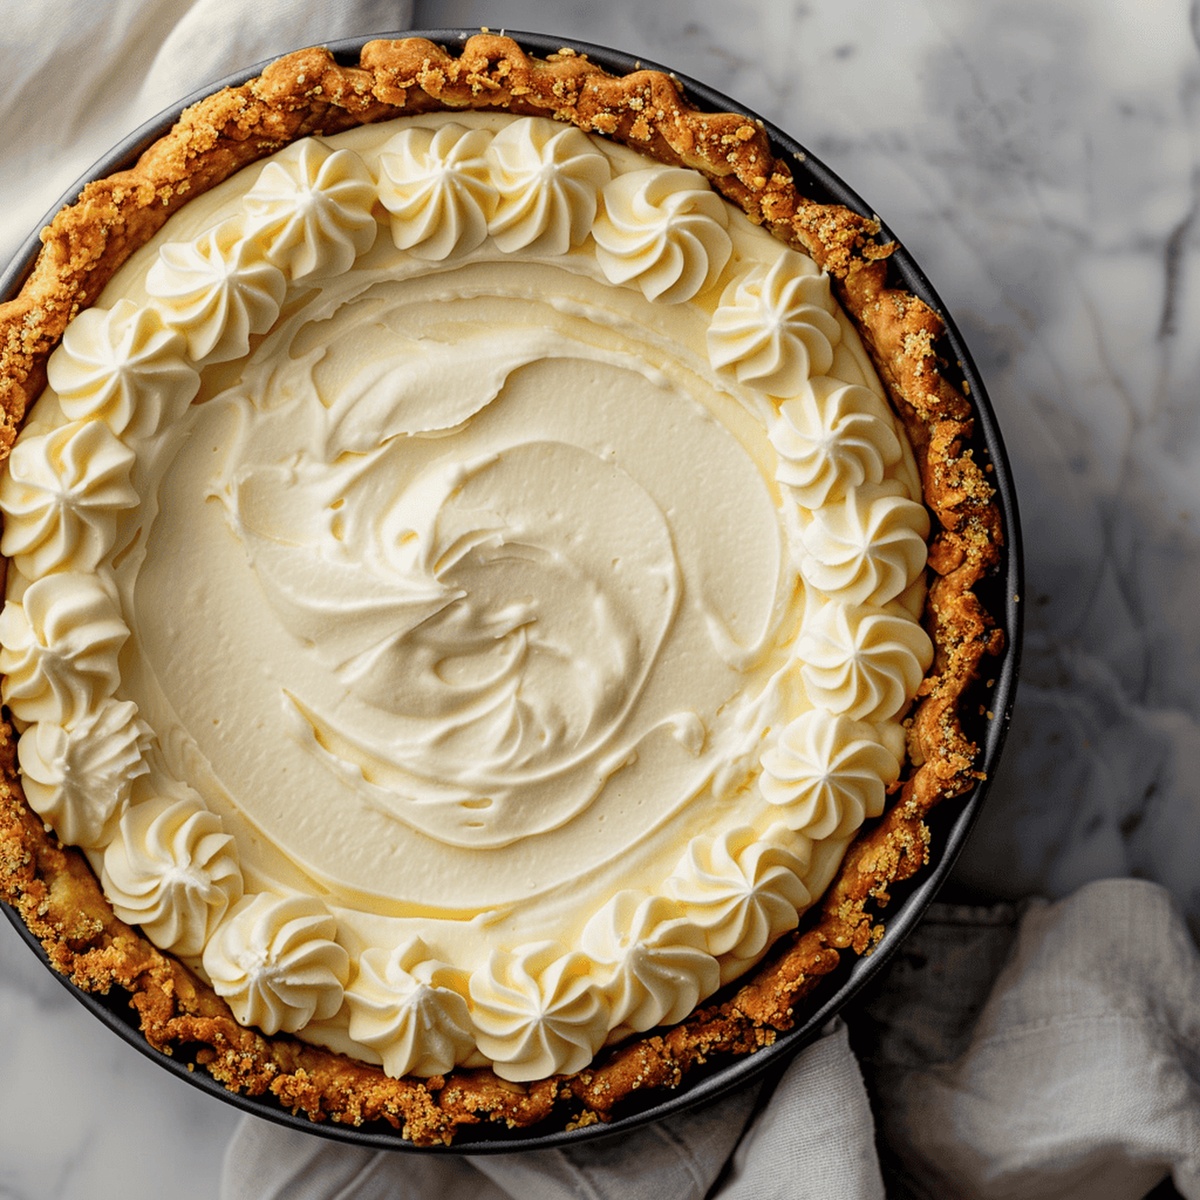
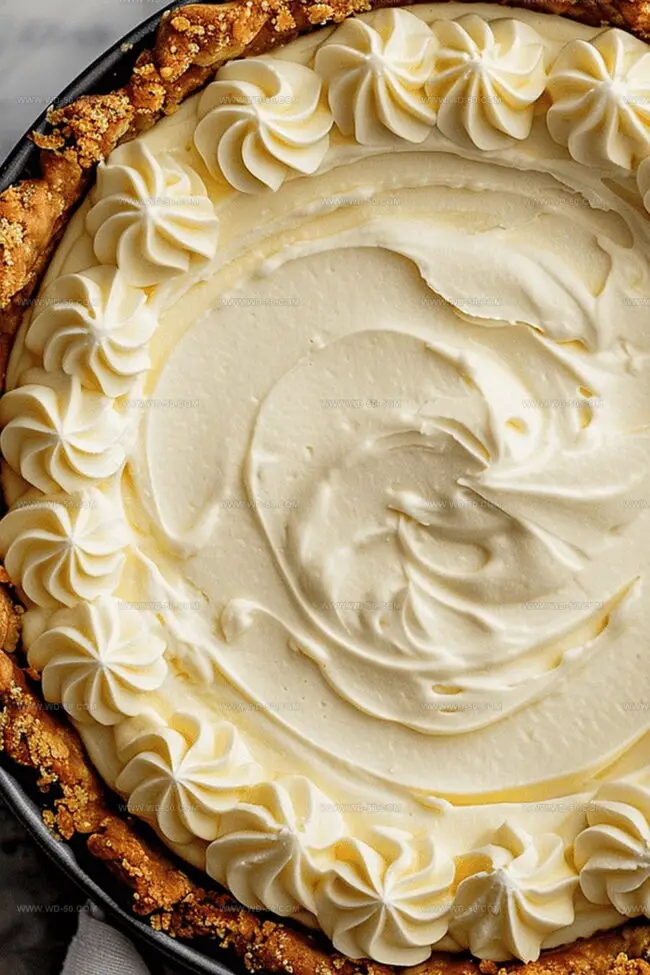
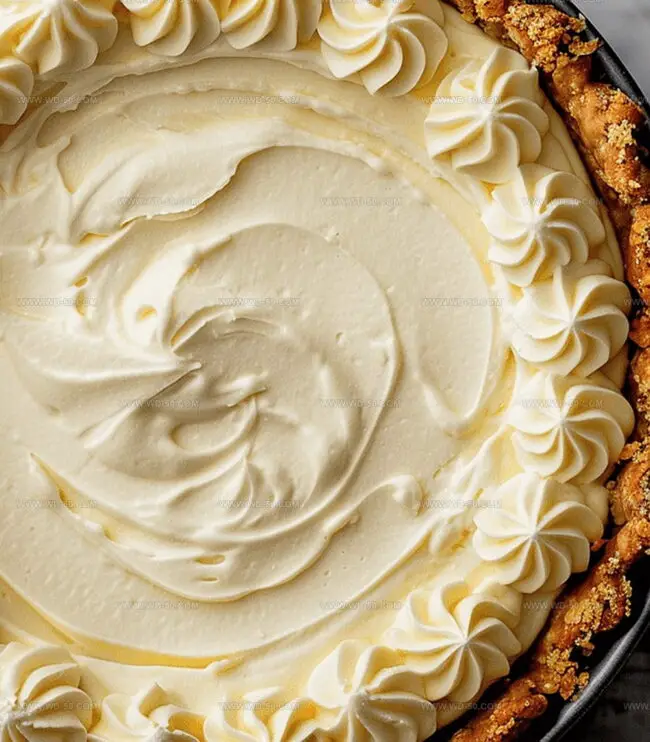
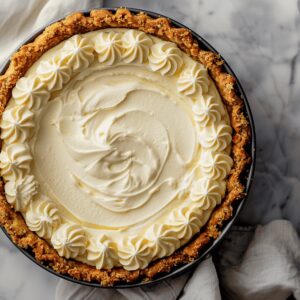
The velvety cream cheese filling nestled in a buttery graham cracker crust creates a harmonious balance of textures and tastes.
Simple ingredients come together effortlessly, turning an ordinary afternoon into a sweet celebration.
Whip up this crowd-pleasing dessert and watch eyes light up with the first heavenly forkful.
Prepare to fall in love with a pie that turns any moment into something special.
Quick Recipe Overview
Prep Time: 10 minutes
Cook Time: 40 minutes
Total Time: 50 minutes
Calories: 307 kcal
Servings: 9
Ingredients You Need for Classic Cream Cheese Pie
For The Creamy Base:
Cream Cheese: Soft, full-fat blocks give the pie its luxurious, velvety texture and rich tangy flavor.
Sour Cream: Adds a subtle tang and incredible smoothness, creating a more complex taste profile.
For Sweetness And Binding:
Sugar: Provides perfect sweetness and helps stabilize the pie’s structure, balancing the cream cheese’s richness.
Eggs: Act as natural binders, creating a silky custard-like consistency and helping the pie set beautifully.
For Flavor Enhancement:
Vanilla Extract: Introduces warm, aromatic undertones that complement the cream cheese’s richness.
Graham Cracker Crust: Delivers a classic, buttery crunch that contrasts beautifully with the smooth filling.
Equipment List for Classic Cream Cheese Pie
Mixing Bowl: Large, sturdy bowl for blending cream cheese and other ingredients smoothly.
Electric Mixer: Handheld or stand mixer to beat cream cheese mixture until perfectly creamy.
Measuring Cups and Spoons: Precise tools for accurate ingredient quantities.
Graham Cracker Crust Pan: 9-inch pie dish or springform pan for creating and baking the dessert.
Spatula: Helps spread topping evenly and scrape mixture from sides of the bowl.
Oven: Essential for baking the pie at specified temperatures.
Whisk: Useful for mixing sour cream topping ingredients.
Cream Cheese Pie Assembly Instructions
Oven Preparation Warm your kitchen’s heart by setting the oven to a cozy 350°F.
Silky Filling Magic In a spacious mixing bowl, whisk cream cheese until it transforms into a cloud-like blend with eggs, sweetness, and vanilla essence.
Crust Foundation Gently pour the dreamy mixture into a waiting graham cracker crust, creating a smooth canvas.
Baking Journey Slide the pie into the oven, letting it bake for 30-35 minutes until the edges stand firm and proud.
Luxurious Topping Craft a luscious layer by stirring sour cream with sugar and vanilla in a separate bowl.
Topping Placement After a brief cooling moment, spread the creamy topping across the pie’s surface like a soft blanket.
Final Heat Blast Crank up the oven temperature to 450°F and return the pie for a quick five-minute shimmer.
Chilling Time Let the cheesecake rest and cool completely, then nestle it in the refrigerator for at least four hours or overnight to develop its full, rich personality.
Serving Celebration Slice and serve this heavenly dessert, adding optional garnishes to make each piece a celebration.
Pro Tips and Variations for Cream Cheese Pie
Ensure cream cheese is fully softened at room temperature to avoid lumps and create a silky-smooth filling.
Experiment with alternative crusts like chocolate cookie, shortbread, or nutty graham cracker variations to add unique flavor profiles.
Enhance the base recipe by incorporating zesty lemon juice, orange extract, or a hint of almond extract for extra depth and complexity.
Top your pie with fresh berries, chocolate shavings, caramel drizzle, or a light dusting of cinnamon to transform the classic dessert into a showstopping treat.
This pie freezes beautifully for up to one month when tightly wrapped, making it perfect for advance party planning or unexpected dessert cravings.
Best Ways to Serve Classic Cream Cheese Pie
Berry Bliss Topping: Scatter fresh strawberries, raspberries, or blueberries across the pie surface for a burst of color and tangy sweetness that complements the creamy cheesecake perfectly.
Chocolate Drizzle Delight: Melt dark or milk chocolate and create elegant swirls or zigzag patterns over the chilled pie, adding a rich, decadent layer that elevates the dessert’s indulgence.
Caramel Crunch Companion: Sprinkle crushed pecans or almonds around the edges, then drizzle warm caramel sauce over the top, creating a delightful contrast of smooth cheesecake and crunchy nutty texture.
Whipped Cream Wonder: Pipe delicate rosettes of fresh whipped cream around the pie’s perimeter, dusting them lightly with cocoa powder or cinnamon for an elegant and inviting presentation.
Storage and Prep for Cream Cheese Pie Fans
Fridge Freshness Strategy: Store your cream cheese pie in an airtight container to maintain its creamy texture and prevent absorption of other refrigerator odors. Wrap tightly with plastic wrap or aluminum foil for maximum protection.
Make-Ahead Magic: This delightful dessert can be prepared up to 3 days in advance, making it perfect for stress-free entertaining. Simply keep it refrigerated and add fresh toppings just before serving.
Slice and Freeze Technique: Cut individual portions and wrap them separately in plastic wrap, then place in a freezer-safe container. Frozen slices will stay delicious for up to 2 weeks, offering a quick sweet treat anytime you desire.
Temperature Timing: Always allow the pie to reach room temperature for about 15-20 minutes before serving to enhance its creamy consistency and bring out the full flavor profile. Remove from the refrigerator just before you’re ready to enjoy your dessert.
Italian-inspired cream cheese pie delivers a luxurious dessert experience with silky smooth texture and rich flavor. Delicate graham cracker crust and creamy filling create perfect balance for passionate bakers craving something special.
Ingredients
Scale
1 prepared graham cracker crust
16 oz (454 g) cream cheese, softened
2 eggs
1 cup (240 ml, 200 g) sugar
1 cup (240 ml) sour cream
2 tbsps (30 g) sugar
1.5 tsps (7.5 ml) vanilla extract
Instructions
Preparation: Position the oven rack in the center and preheat to 350°F (175°C), creating an ideal environment for baking the cheesecake.
Filling Creation: Blend cream cheese, eggs, sugar, and vanilla extract in a large mixing bowl until achieving a silky, uniform texture that eliminates any potential lumps.
Crust Filling: Gently pour the smooth cream cheese mixture into the prepared graham cracker crust, ensuring an even distribution across the surface.
Initial Baking: Bake for 30-35 minutes, monitoring the edges for firmness and the center for a subtle jiggle when gently nudged, indicating perfect doneness.
Topping Preparation and First Stage Cooling: While the pie bakes, whisk together sour cream, sugar, and vanilla extract; after removing the pie from the oven, allow it to rest for 5-10 minutes to stabilize.
Topping Application and Final Baking: Spread the sour cream mixture evenly across the surface, then return to the oven at 450°F (230°C) for 5 minutes to set the topping and create a light golden sheen.
Cooling and Setting: Let the cheesecake cool completely at room temperature for about an hour, then refrigerate for a minimum of 4 hours or overnight to develop a rich, creamy consistency.
Serving Presentation: Before serving, optional garnishes include fresh berries, whipped cream, or a delicate dusting of powdered sugar to elevate the visual appeal.
Notes
Prevent Cracking: Avoid overbeating cream cheese and eggs to maintain a smooth, crack-free surface by mixing just until ingredients are combined.
Temperature Matters: Allow cream cheese and eggs to reach room temperature before mixing to ensure a silky, lump-free filling and even baking.
Cooling Technique: Let the cheesecake cool gradually at room temperature to prevent sudden temperature changes that can cause structural cracks or uneven texture.
Chilling is Critical: Refrigerate for at least 4 hours to allow the filling to completely set and develop a rich, creamy consistency that’s essential for perfect texture.
Founder, Head Recipe Developer & Cuisine Specialist
Expertise
Recipe Development and Testing, Modern American and European Cuisines, Food Styling and Photography, Culinary Education and Workshops
Education
Johnson & Wales University
Degree: Bachelor of Science in Culinary Arts
Focus: Comprehensive training in classical and modern cooking techniques, kitchen management, and global cuisines.
Auguste Escoffier School of Culinary Arts
Program: Diploma in Pastry Arts
Focus: Specialized education in baking and pastry, emphasizing artisanal bread, confections, and plated desserts.
Michael Reynolds is the founder and head recipe creator at wd-50.com. With over 15 years of experience in the kitchen, he’s spent time working in top restaurants and now focuses on making great food easy for everyone at home.
Michael studied culinary arts at Johnson & Wales University and later trained in pastry at the Auguste Escoffier School. He knows his way around both savory meals and sweet treats.
At wd-50.com, his goal is to help you feel confident in the kitchen, whether you’re trying something new or cooking a favorite dish. He loves using fresh ingredients and simple steps that still bring out big flavors.
Michael Reynolds
Founder, Head Recipe Developer & Cuisine Specialist
Expertise
Recipe Development and Testing, Modern American and European Cuisines, Food Styling and Photography, Culinary Education and Workshops
Education
Johnson & Wales University
Auguste Escoffier School of Culinary Arts
Michael Reynolds is the founder and head recipe creator at wd-50.com. With over 15 years of experience in the kitchen, he’s spent time working in top restaurants and now focuses on making great food easy for everyone at home.
Michael studied culinary arts at Johnson & Wales University and later trained in pastry at the Auguste Escoffier School. He knows his way around both savory meals and sweet treats.
At wd-50.com, his goal is to help you feel confident in the kitchen, whether you’re trying something new or cooking a favorite dish. He loves using fresh ingredients and simple steps that still bring out big flavors.