Heavenly Mini Cannoli Cups Recipe: Sweet Bites of Italian Bliss
Dessert lovers rejoice as these delightful mini cannoli cups bring the authentic taste of Sicily right to your table.
The crispy, bite-sized shells packed with rich cannoli filling will make your taste buds dance with excitement.
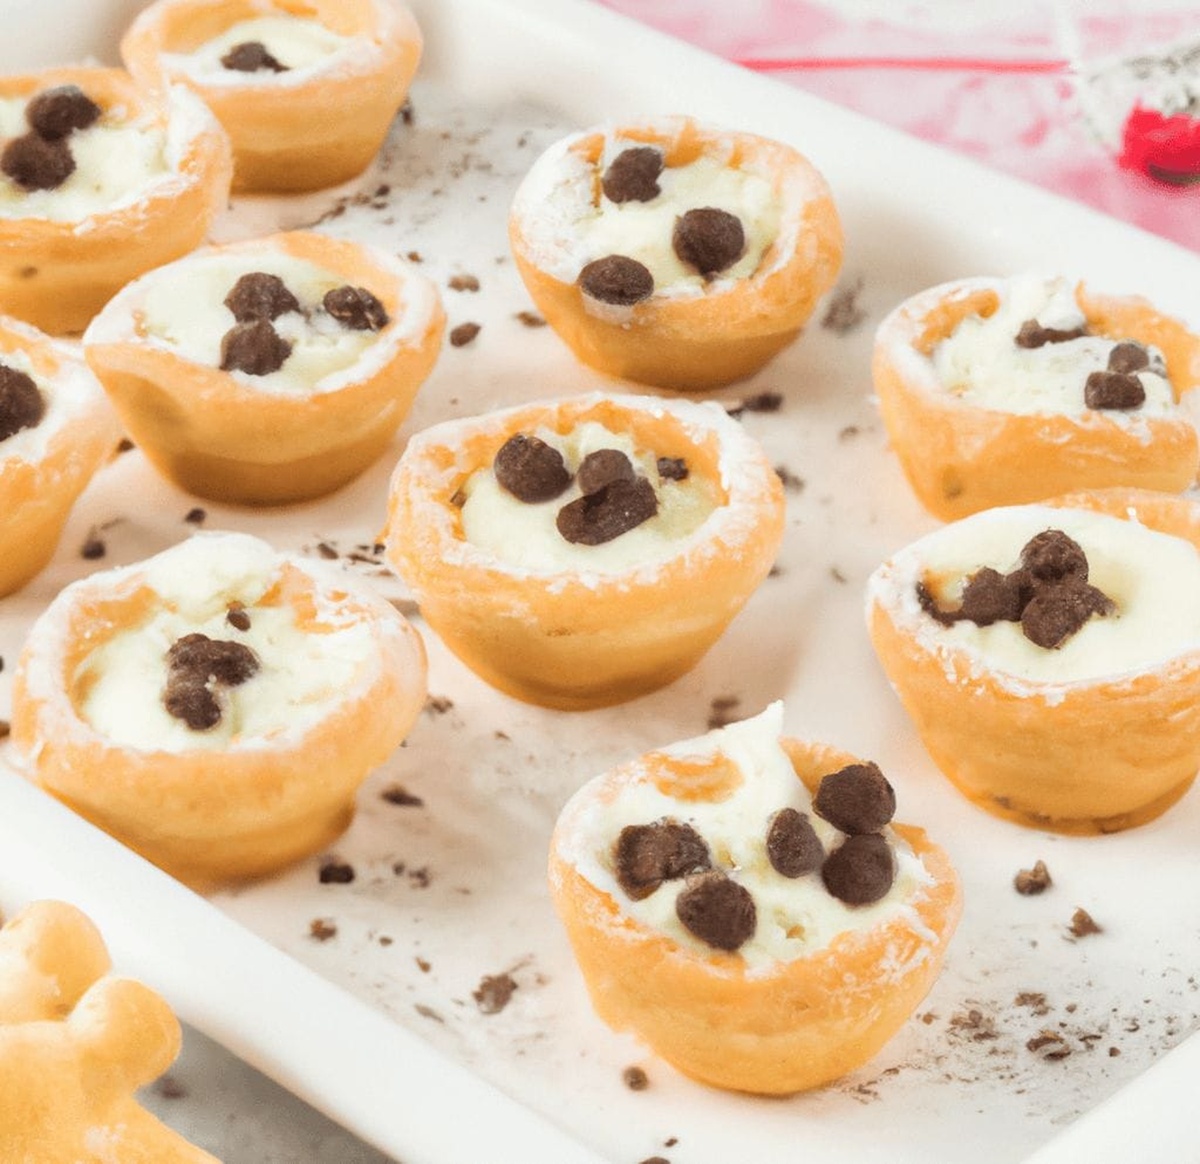
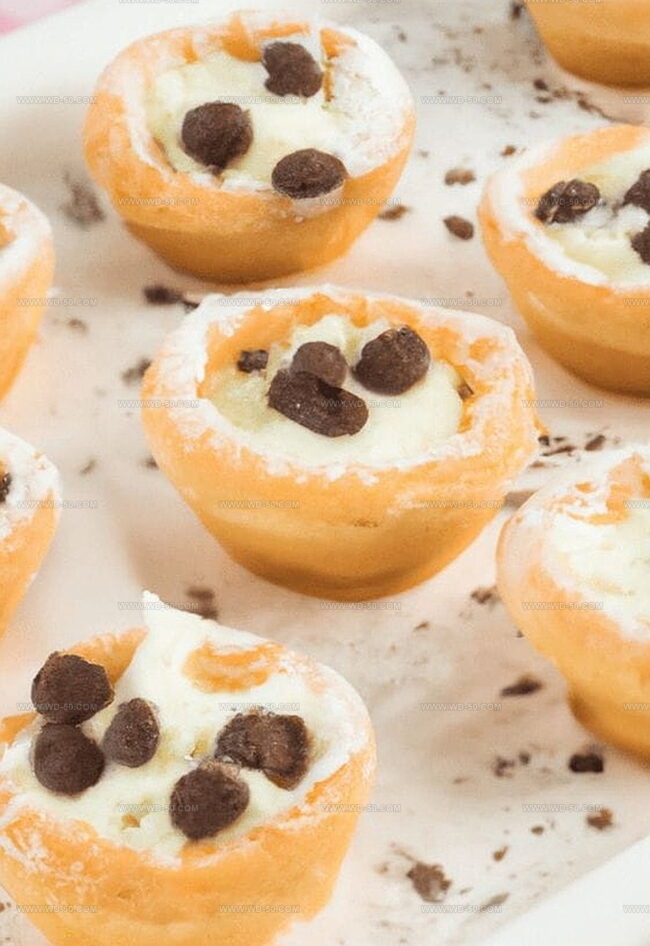
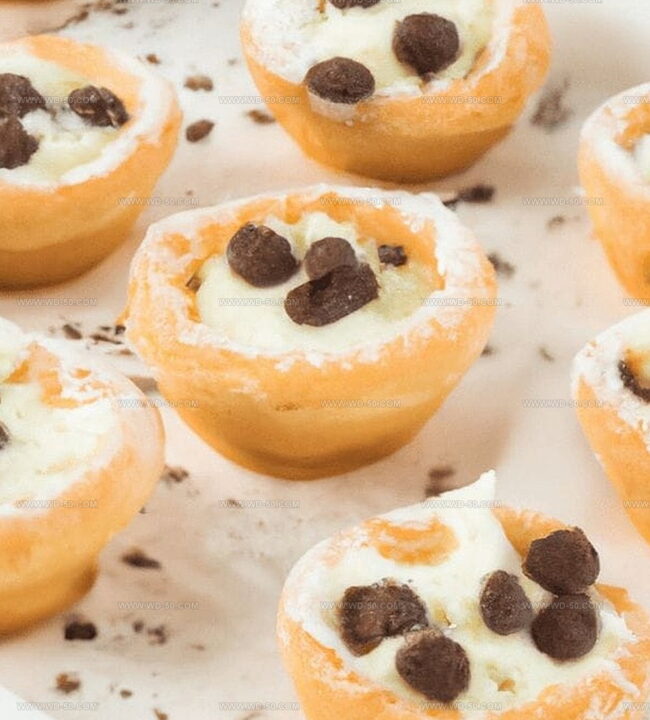
Each mini cannoli cup delivers a perfect balance of creamy ricotta and sweet chocolate chips that melts seamlessly in your mouth.
These elegant treats are surprisingly simple to create, requiring just a few basic ingredients and minimal preparation time.
The delicate pastry shells cradle a luxurious filling that promises to impress even the most discerning dessert enthusiasts.
Packed with irresistible flavors and a touch of Italian charm, these mini cannoli cups are sure to become your new favorite sweet indulgence.
Prepare to transport yourself to the sun-drenched streets of Italy with every delectable bite.
Quick Recipe Overview
Ingredients for Mini Cannoli Cups
For Creamy Filling:For Crispy Cups:For Finishing Touches:Tools for Assembling Mini Cannoli Cups
Steps to Make Mini Cannoli Cups
Create delicate pie crust circles with a delightful sugar and cinnamon coating. Gently press these delicate rounds into mini muffin tins, transforming simple dough into adorable tiny shells ready for filling.
Bake the delicate pastry shells until they turn a beautiful golden brown color. Allow them to cool completely, creating the perfect crispy vessel for the creamy filling.
Blend ricotta with sweet sugars and a hint of citrus zest, creating a luxurious cream that will dance on taste buds. Transfer this silky mixture into a piping bag, preparing for an elegant presentation.
Carefully pipe the luscious cream into each crispy shell. Sprinkle with chocolate chips or crushed pistachios, then dust with a light snow of powdered sugar. These mini cannoli cups are now ready to enchant and delight guests with their miniature elegance.
Helpful Tips for Mini Cannoli Cups
Serving Mini Cannoli Cups with Style
Saving Mini Cannoli Cups for Later
Print
Delightful Mini Cannoli Cups Recipe
- Total Time: 30 minutes
- Yield: 21 1x
Description
Sicilian-inspired mini cannoli cups deliver delightful dessert magic in bite-sized portions. Sweet ricotta filling and crisp pastry shells create an irresistible Italian treat you’ll want to share with friends and family.
Ingredients
- 15 oz / 425 g ricotta cheese
- ½ cup / 100 g powdered sugar
- 2 tbsps / 30 g granulated sugar
- 3 tbsps / 45 g turbinado sugar
- 1 box pie crusts (softened)
- 1 tsp ground cinnamon
- 1 tsp orange or lemon zest
- ½ tsp vanilla extract
- ¼ cup / 40 g mini chocolate chips or chopped pistachios
- Extra powdered sugar
Instructions
- Preheat: Position oven rack to 425°F (218°C). Unfold pie crusts and generously coat with turbinado sugar and ground cinnamon, gently rolling to embed the sweet mixture into the dough.
- Prepare Shells: Cut rounds from seasoned pie crusts using a circular cookie cutter, pressing them smoothly into mini muffin tin cavities. Ensure even placement and crisp edges.
- Bake Pastry: Roast pastry shells for 10-12 minutes until achieving a rich golden-brown color. Allow shells to cool completely at room temperature, creating a crisp foundation for the filling.
- Create Filling: Whisk ricotta cheese, powdered sugar, granulated sugar, orange or lemon zest, and vanilla extract in a medium bowl until achieving a uniform, creamy consistency with vibrant citrus undertones.
- Assemble Cups: Fill a piping bag with the ricotta cream, carefully piping the mixture into each cooled pastry shell. Ensure a generous, smooth filling that reaches the shell’s rim.
- Garnish and Finish: Embellish the cannoli cups with a sprinkle of chocolate chips or chopped pistachios. Dust lightly with powdered sugar for an elegant, professional presentation. Serve immediately to savor the delicate textures and flavors.
Notes
- Crust Tip: Use cold pie crusts for flakier, more delicate pastry shells that hold their shape perfectly.
- Sugar Secret: Rolling sugar and cinnamon into the dough creates a caramelized, aromatic crust with extra crunch and flavor.
- Filling Freshness: Drain ricotta cheese overnight in cheesecloth to remove excess moisture, ensuring a thick, creamy filling that won’t become watery.
- Storage Strategy: Assemble these mini cannoli cups just before serving to maintain the crisp texture of the pastry shells and prevent soggy bottoms.
- Prep Time: 20 minutes
- Cook Time: 10 minutes
- Category: Desserts
- Method: Baking
- Cuisine: Italian
Nutrition
- Serving Size: 21
- Calories: 150
- Sugar: 8 g
- Sodium: 50 mg
- Fat: 6 g
- Saturated Fat: 2 g
- Unsaturated Fat: 4 g
- Trans Fat: 0 g
- Carbohydrates: 20 g
- Fiber: 1 g
- Protein: 3 g
- Cholesterol: 10 mg
Michael Reynolds
Founder, Head Recipe Developer & Cuisine Specialist
Expertise
Recipe Development and Testing, Modern American and European Cuisines, Food Styling and Photography, Culinary Education and Workshops
Education
Johnson & Wales University
Auguste Escoffier School of Culinary Arts
Michael Reynolds is the founder and head recipe creator at wd-50.com. With over 15 years of experience in the kitchen, he’s spent time working in top restaurants and now focuses on making great food easy for everyone at home.
Michael studied culinary arts at Johnson & Wales University and later trained in pastry at the Auguste Escoffier School. He knows his way around both savory meals and sweet treats.
At wd-50.com, his goal is to help you feel confident in the kitchen, whether you’re trying something new or cooking a favorite dish. He loves using fresh ingredients and simple steps that still bring out big flavors.