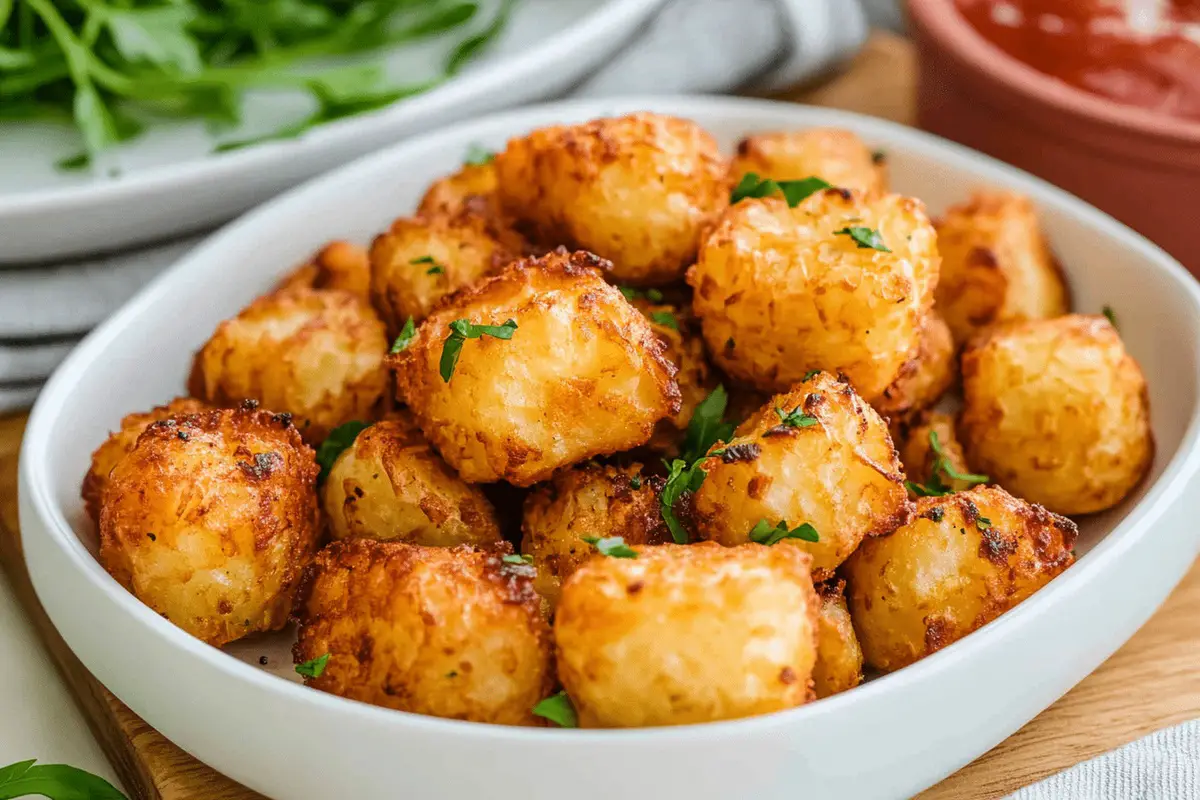
Crispy potato nuggets, also known as tater tots, are a favorite comfort food that transforms simple ingredients into a tasty treat.
Many people have discovered the fun of making these golden-brown bites from scratch, taking them beyond the usual frozen kind.
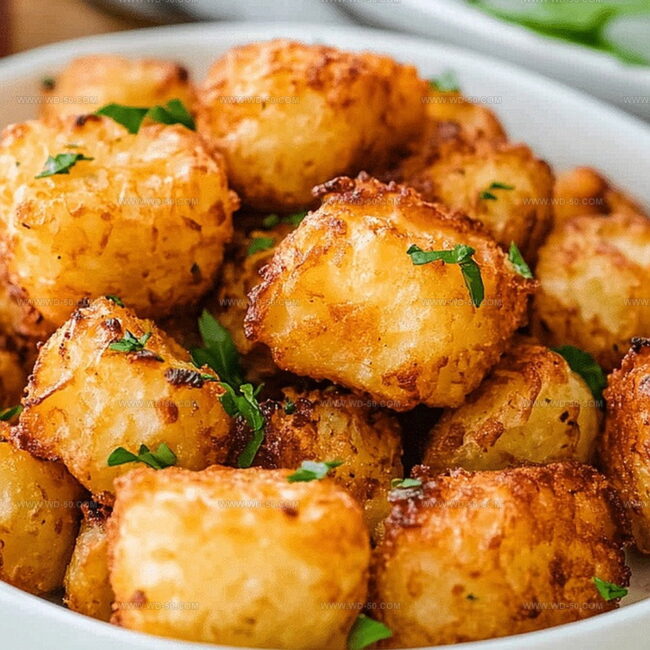
The magic of homemade tater tots is in their perfect mix of crunchy outside and soft inside.
Potatoes, seasonings, and a few easy steps come together to make these irresistible snacks that bring back happy memories at mealtime.
Kitchens buzz with the sizzling sound and mouthwatering smell of freshly made potato bites.
Making your own tater tots is an exciting adventure in cooking, letting you try out different flavors and methods to turn an ordinary potato into a hit with everyone.
Why Homemade Tater Tots Hit The Spot
Craft Homemade Comfort: Create delicious tater tots from scratch that taste far better than frozen varieties.
Quick Kitchen Magic: Prepare these crispy potato bites in just about 45 minutes, making them perfect for spontaneous snack cravings.
Crowd-Pleasing Technique: Master a simple recipe that transforms basic potatoes into golden, crunchy treats everyone will love, from kids to adults.
Customizable Flavor Adventure: Experiment with different seasonings like paprika, herbs, or cheese to make these tots uniquely yours while maintaining their irresistible texture.
Everything That Goes In Homemade Tater Tots
Potato Base:
Potatoes: Starchy and hearty base for crispy tater tots, best with russet or Yukon gold varieties.
Salt: Helps draw out moisture and enhances overall flavor.
Seasoning Blend:
Flour: Helps bind ingredients and create crispy exterior.
Garlic Powder, Onion Powder: Adds depth and aromatic flavor to the tots.
Black Pepper: Provides mild heat and subtle spiciness.
Frying Components:
Vegetable Oil: Essential for deep frying and creating golden, crispy exterior.
Parsley: Optional fresh herb for garnish and bright color accent, adds light herbal note.
Additional Notes:
Choose potatoes that are firm and free from sprouts or green patches.
Use high-heat neutral oil with high smoke point for best frying results.
Fresh spices will provide more intense flavor compared to older seasonings.
Easy Steps To Make Homemade Tater Tots
Step 1: Prepare Potato Base
Peel potatoes and place in a large stockpot
Fill pot with cold water completely covering potatoes
Bring water to a rapid boil
Cook potatoes for 6-7 minutes until slightly tender but still firm
Remove potatoes and let cool completely at room temperature
Step 2: Create Potato Mixture
Grab a box grater and shred cooled potatoes
Place shredded potatoes in a cheesecloth-lined colander
Sprinkle kosher salt over potatoes
Press down firmly to remove excess liquid
Transfer dry potato shreds to a clean mixing bowl
Step 3: Season Potato Mixture
Add to potato shreds
All-purpose flour
Garlic powder
Onion powder
Ground black pepper
Kosher salt
Mix ingredients thoroughly using hands
Blend until mixture holds together smoothly
Step 4: Shape Tater Tots
Roll potato mixture into small cylindrical shapes
Cut rolled mixture into bite-sized sections
Create uniform tot shapes approximately 1½ inches long
Ensure each tot is compact and well-formed
Step 5: Fry Crispy Tots
Heat vegetable oil in a deep stockpot
Warm oil to 370-375 degrees Fahrenheit
Carefully drop tots into hot oil
Fry 7-8 tots per batch
Cook for approximately 5 minutes
Rotate tots frequently to prevent burning
Remove when golden brown and crispy
Step 6: Serve and Enjoy
Transfer tots to paper towel-lined plate
Sprinkle with additional salt
Garnish with fresh chopped parsley
Serve immediately with preferred dipping sauces
Simple Tips For Homemade Tater Tots
Master Moisture Removal: Squeeze out as much liquid as possible from shredded potatoes using a clean kitchen towel or cheesecloth to ensure extra crispy tots that hold their shape perfectly during frying.
Choose the Right Potato: Select starchy potatoes like Russet or Idaho for the best texture and binding, which help create a fluffy interior with a crisp golden exterior.
Temperature Precision Matters: Use a kitchen thermometer to maintain oil at 370-375°F, preventing soggy tots and ensuring a crunchy, evenly cooked result every time.
Batch Frying Technique: Avoid overcrowding the pot when frying, cooking 7-8 tots at a time to maintain consistent oil temperature and achieve maximum crispiness.
Season Beyond Salt: Experiment with additional spices like smoked paprika, cayenne, or dried herbs to elevate the flavor profile of your homemade tater tots and make them uniquely delicious.
How To Store And Reheat Homemade Tater Tots
Refrigerate: Store leftover tater tots in an airtight container for up to 3-4 days in the refrigerator, keeping them crisp and fresh.
Freeze: Place cooled tater tots on a baking sheet, freeze until solid, then transfer to a freezer bag for storage up to 2 months.
Reheat Oven: Spread tots on a baking sheet, bake at 425°F for 10-15 minutes, turning halfway through to restore crispiness.
Reheat Air Fryer: Cook frozen or refrigerated tots at 375°F for 4-6 minutes, shaking basket midway to ensure even heating and maximum crunchiness.
Dips And Sides For Homemade Tater Tots
Elevate Dipping Delights: Whip up a bold sriracha mayo by mixing mayonnaise, sriracha sauce, and a splash of lime juice for a spicy kick that complements the crispy potato bites.
Craft Beer Connection: Select a hoppy craft IPA or a crisp pilsner that cuts through the tots’ richness with refreshing carbonation and balanced bitterness.
Herbed Ranch Revolution: Create a homemade ranch dip blending fresh chives, dill, and garlic into creamy buttermilk for a tangy, herbaceous companion that enhances the tater tots’ savory profile.
Protein Pairing Power: Serve alongside grilled chicken tenders or mini sliders to transform these tots into a complete, satisfying meal with contrasting textures and flavors.
Switch It Up With Homemade Tater Tots
Gluten-Free Potato Gems: Replace wheat flour with cornstarch or rice flour to create a celiac-friendly version that maintains the crispy texture and delicious taste.
Herb-Infused Potato Bites: Add fresh chopped rosemary, thyme, or chives to the potato mixture for an aromatic and flavorful alternative that elevates the classic recipe.
Air Fryer Lighter Option: Skip deep-frying and use an air fryer at 400°F for 12-15 minutes, turning halfway through to achieve a healthier, lower-fat version of the classic tater tots.
Spicy Southwestern Potato Nuggets: Mix in diced jalapeños, ground cumin, and chili powder to create a zesty, southwest-inspired potato bite with a kick of heat.
Questions On Homemade Tater Tots
Why do I need to parboil the potatoes before shredding?
Parboiling helps partially cook the potatoes and prevents them from turning brown, ensuring a better texture and color for your tater tots.
Can I use a different type of potato for this recipe?
Russet potatoes work best due to their high starch content, which helps the tots hold their shape and become crispy.
How do I know if I’ve removed enough moisture from the shredded potatoes?
Press the potatoes firmly in the cheesecloth. If liquid continues to come out, keep pressing. Removing excess moisture is crucial for achieving crispy tater tots.
What if I don’t have a box grater?
You can use a food processor with a shredding attachment or carefully use a sharp knife to create thin potato slices, though a box grater provides the best texture for homemade tater tots.
Crispy Homemade Tater Tots bring nostalgic comfort straight from your kitchen, packed with golden potato goodness. Crunchy exterior and creamy interior promise delightful bites that elevate classic potato snacks with simple, wholesome ingredients you’ll crave.
Ingredients
Scale
Main Ingredients:
3–4 medium russet potatoes, peeled
Seasonings:
1 teaspoon garlic powder
1 teaspoon onion powder
½ teaspoon black pepper
½ teaspoon salt (+ more for topping and processing potatoes)
Binding and Cooking Ingredients:
3–4 tablespoons all-purpose flour
Vegetable oil, for frying
1 tablespoon fresh parsley, chopped (optional)
Instructions
Prepare the potato base by immersing peeled potatoes in a generously sized pot, covering them completely with water, and gently bringing the liquid to a rolling boil for approximately 6-7 minutes until they reach a partially cooked, yet sturdy consistency.
Allow the potatoes to cool to room temperature, then transform them into delicate strands using a sharp box grater, strategically transferring the shredded contents into a cheesecloth-lined strainer.
Sprinkle a pinch of salt over the potato shreds, allowing moisture to release naturally through gentle pressure. After 10 minutes, compress the mixture thoroughly, extracting excess liquid and ensuring a dry texture.
Incorporate garlic powder, onion powder, black pepper, and additional salt into the potato mixture, blending thoroughly with clean hands to create a cohesive texture.
Craft uniform cylindrical shapes by rolling the seasoned potato blend, then slice into compact, bite-sized segments resembling traditional tater tots.
Preheat cooking oil in a deep pot to a precise temperature range of 370-375°F, creating an ideal frying environment for golden-brown transformation.
Carefully introduce potato nuggets into the hot oil in small clusters, rotating frequently to prevent adherence and ensure even, crispy browning across all surfaces.
Once achieving a rich, golden exterior, transfer the tots to an absorbent paper towel surface, immediately seasoning with a light salt dusting.
Optionally garnish with freshly chopped parsley and serve alongside preferred dipping condiments while maintaining optimal warmth and crispiness.
Notes
Moisture Matters: Thoroughly drain potatoes to achieve crispy, golden-brown exteriors that won’t become soggy during frying.
Seasoning Secrets: Experiment with additional herbs like rosemary or thyme to elevate the flavor profile and create a unique twist on classic tater tots.
Gluten-Free Option: Swap wheat flour with cornstarch or gluten-free flour blend to make these tots accessible for those with
Founder, Head Recipe Developer & Cuisine Specialist
Expertise
Recipe Development and Testing, Modern American and European Cuisines, Food Styling and Photography, Culinary Education and Workshops
Education
Johnson & Wales University
Degree: Bachelor of Science in Culinary Arts
Focus: Comprehensive training in classical and modern cooking techniques, kitchen management, and global cuisines.
Auguste Escoffier School of Culinary Arts
Program: Diploma in Pastry Arts
Focus: Specialized education in baking and pastry, emphasizing artisanal bread, confections, and plated desserts.
Michael Reynolds is the founder and head recipe creator at wd-50.com. With over 15 years of experience in the kitchen, he’s spent time working in top restaurants and now focuses on making great food easy for everyone at home.
Michael studied culinary arts at Johnson & Wales University and later trained in pastry at the Auguste Escoffier School. He knows his way around both savory meals and sweet treats.
At wd-50.com, his goal is to help you feel confident in the kitchen, whether you’re trying something new or cooking a favorite dish. He loves using fresh ingredients and simple steps that still bring out big flavors.


Michael Reynolds
Founder, Head Recipe Developer & Cuisine Specialist
Expertise
Recipe Development and Testing, Modern American and European Cuisines, Food Styling and Photography, Culinary Education and Workshops
Education
Johnson & Wales University
Auguste Escoffier School of Culinary Arts
Michael Reynolds is the founder and head recipe creator at wd-50.com. With over 15 years of experience in the kitchen, he’s spent time working in top restaurants and now focuses on making great food easy for everyone at home.
Michael studied culinary arts at Johnson & Wales University and later trained in pastry at the Auguste Escoffier School. He knows his way around both savory meals and sweet treats.
At wd-50.com, his goal is to help you feel confident in the kitchen, whether you’re trying something new or cooking a favorite dish. He loves using fresh ingredients and simple steps that still bring out big flavors.