Spiced Chickpea Zaatar Flatbread Recipe: Magical Flavor Fusion
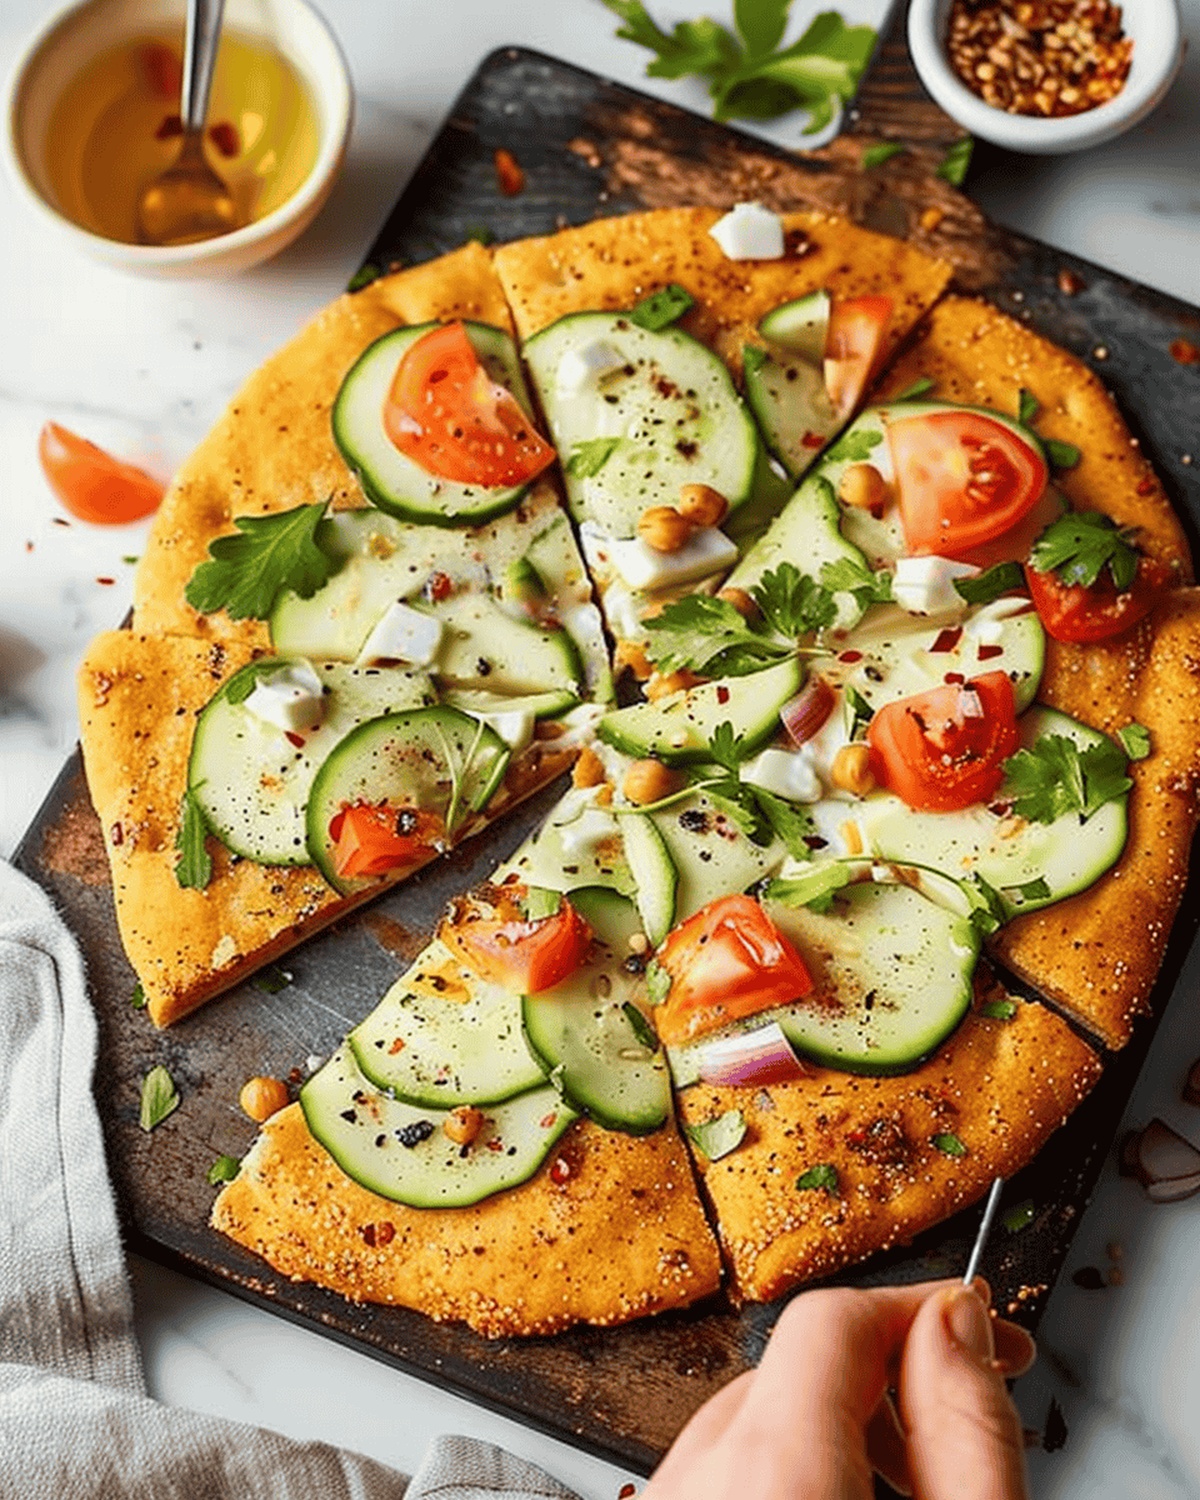
Warm, aromatic zaatar dances across a crispy chickpea flatbread that captures the essence of Middle Eastern comfort food.
Fragrant herbs and nutty spices blend perfectly in this simple yet stunning recipe.
The zaatar chickpea flatbread brings together traditional flavors with a modern twist that delights the palate.
Earthy chickpea flour creates a rich, golden base that cradles the vibrant spice blend.
Each bite promises a delectable journey through layers of texture and taste.
Baking this flatbread fills your kitchen with an irresistible aroma that beckons everyone to the table.
Serve this delightful creation and watch as friends and family savor every delicious morsel.
Quick Recipe Overview
What Goes Into Chickpea Za’atar Flatbread
For The Base:For Fresh Vegetables and Herbs:For Seasoning and Finishing:Tools You’ll Need for Chickpea Za’atar Flatbread
Steps to Make Chickpea Za’atar Flatbread from Scratch

Combine chickpea flour with aromatic herbs and spices in a mixing bowl. Whisk together with liquid ingredients until silky smooth. Allow mixture to rest and develop rich flavors.
Position oven rack centrally and activate broiler. Warm a cast-iron skillet to create a perfect crispy foundation for the flatbread.
Coat skillet with olive oil and pour half the batter. Spread evenly across surface for uniform cooking. Broil until edges transform into golden, crunchy perfection.
Repeat the process with remaining batter, ensuring consistent texture and color. Use fresh olive oil to prevent sticking and enhance flavor profile.
Customize flatbread with your favorite garnishes. Drizzle with high-quality olive oil, sprinkle with sea salt, and serve immediately while warm and crisp.
Tips and Variations for Chickpea Za’atar Flatbread Lovers
Ways to Serve Chickpea Za’atar Flatbread with Flair
Store and Plan Ahead with Chickpea Za’atar Flatbread
Print
Crispy Chickpea Zaatar Flatbread Recipe
- Total Time: 1 hour
- Yield: 3 1x
Description
Chickpea zaatar flatbread showcases Mediterranean culinary magic with simple, hearty ingredients. Crisp edges and warm spices invite home cooks to savor this delightful comfort dish that connects cultures through shared kitchen traditions.
Ingredients
- 1 cup Greek yogurt (or vegan alternative)
- 2 teaspoons (10 g) sea salt
- 2 tablespoons (30 g) za’atar seasoning
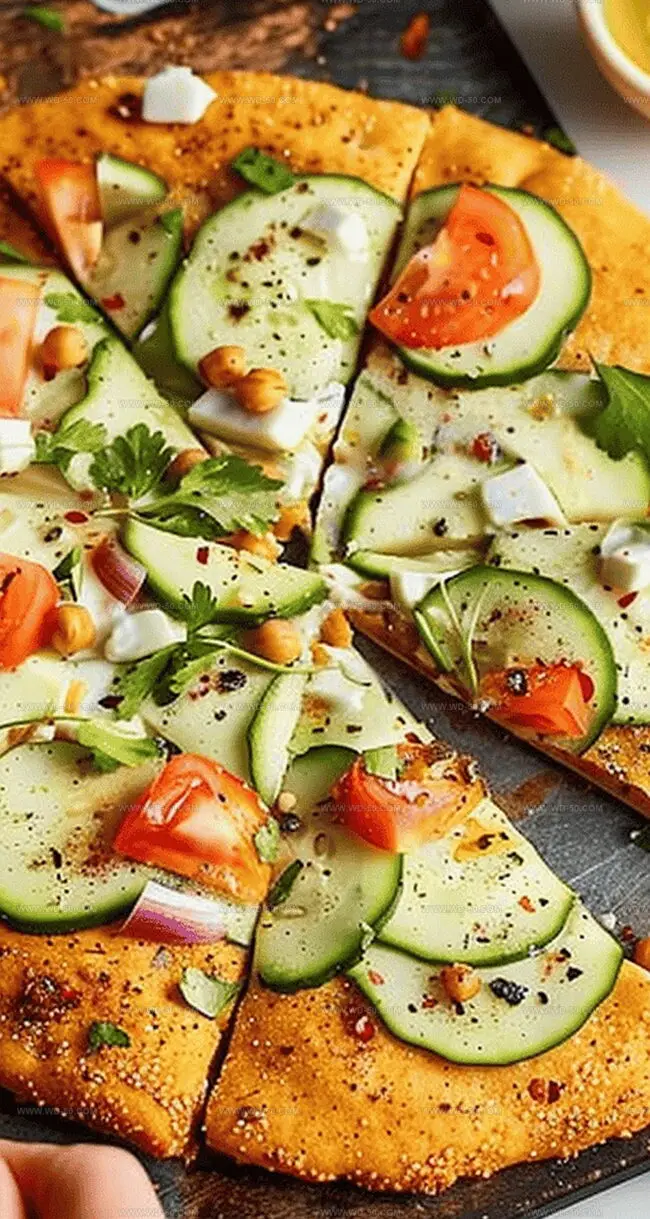
- 2 cucumbers, sliced
- 2 tomatoes, sliced
- 1 red onion, diced
- ¼ cup fresh herbs (cilantro, parsley, mint)
- 1 lemon, cut into wedges for serving
- Freshly ground black pepper
Instructions
- Preparation: Whisk chickpea flour with garlic, parsley, cilantro, cumin, coriander, za’atar, lemon juice, and olive oil in a large mixing bowl until smoothly combined.
- Batter Development: Gradually add water while continuously whisking to create a silky, lump-free batter. Let the mixture rest at room temperature for 30-60 minutes to enhance flavor complexity.
- Oven Preparation: Center the oven rack and activate the broiler. Preheat a 10-inch cast-iron skillet for 5 minutes to create an intensely heated cooking surface.
- Cooking Process: Carefully remove the hot skillet using heat-resistant mitts, coat with olive oil, and pour half the batter, tilting to ensure even distribution.
- Broiling Technique: Slide the skillet under the broiler, cooking 5-15 minutes until edges transform into a crispy, golden-brown landscape with perfectly caramelized edges.
- Finishing and Serving: Repeat the process with remaining batter, then garnish each flatbread with optional toppings, a drizzle of olive oil, sea salt, and freshly cracked black pepper. Serve warm and enjoy the aromatic, herb-infused creation.
Notes
- Optimize Batter Consistency: Whisk thoroughly to eliminate lumps, creating a smooth texture that ensures even cooking and a delightful mouthfeel.
- Maximize Flavor Development: Allow batter to rest at room temperature, enabling herbs and spices to meld and intensify the overall taste profile.
- Master Broiler Technique: Watch the flatbread closely while cooking, as broiler intensity varies; golden-brown edges indicate perfect doneness without burning.
- Customize Serving Options: Experiment with various toppings like herbs, crumbled cheese, or roasted vegetables to elevate the flatbread’s versatility and personal flair.
- Prep Time: 45 minutes
- Cook Time: 15 minutes
- Category: Lunch, Dinner, Snacks
- Method: Broiling
- Cuisine: Middle Eastern
Nutrition
- Serving Size: 3
- Calories: 200
- Sugar: 4 g
- Sodium: 600 mg
- Fat: 5 g
- Saturated Fat: 2 g
- Unsaturated Fat: 3 g
- Trans Fat: 0 g
- Carbohydrates: 30 g
- Fiber: 6 g
- Protein: 10 g
- Cholesterol: 10 mg
Michael Reynolds
Founder, Head Recipe Developer & Cuisine Specialist
Expertise
Recipe Development and Testing, Modern American and European Cuisines, Food Styling and Photography, Culinary Education and Workshops
Education
Johnson & Wales University
Auguste Escoffier School of Culinary Arts
Michael Reynolds is the founder and head recipe creator at wd-50.com. With over 15 years of experience in the kitchen, he’s spent time working in top restaurants and now focuses on making great food easy for everyone at home.
Michael studied culinary arts at Johnson & Wales University and later trained in pastry at the Auguste Escoffier School. He knows his way around both savory meals and sweet treats.
At wd-50.com, his goal is to help you feel confident in the kitchen, whether you’re trying something new or cooking a favorite dish. He loves using fresh ingredients and simple steps that still bring out big flavors.