Crispy Ina Garten Parmesan Cheese Crisps Recipe

Ina Garten’s Golden Parmesan Cheese Crisps: A Snappy Homemade Recipe

Golden, crispy, and utterly irresistible, these Ina Garten parmesan cheese crisps dance with delicate elegance on the culinary stage.

Delicate cheese wafers offer a sophisticated twist to traditional snacking that will leave appetites thoroughly enchanted.

Professional chefs and home cooks alike adore how simple yet impressive these crisps can be.

Each delicate round promises a rich, nutty flavor that melts deliciously on the tongue.

Crafted with just a few premium ingredients, these parmesan crisps bring gourmet flair to any gathering or quiet afternoon nibble.

The magic lies in selecting high-quality parmesan and mastering the precise baking technique.

Serve them alongside salads, soups, or enjoy them as a standalone crispy treat that elevates any meal from ordinary to extraordinary.

Tools for Preparing Ina Garten Parmesan Cheese Crisps

  • Baking Sheet: Silicone or parchment-lined tray for even cheese cooking.
  • Tablespoon: Perfect for portioning out precise cheese amounts.
  • Spatula or Flat Utensil: Helps gently pat down cheese for uniform crisps.
  • Oven: Essential for transforming cheese into crispy, golden treats.

How to Bake Ina Garten Parmesan Cheese Crisps

How to Bake Ina Garten Parmesan Cheese Crisps

Parmesan Cheese Crisps

  • Oven Preparation Warm up your kitchen's oven to a toasty 400 degrees, creating the perfect environment for crispy magic.
  • Baking Surface Grab a silicone mat or parchment paper and lay it smoothly on a sturdy baking tray, ensuring a non-stick canvas for your cheesy creation.
  • Cheese Placement Sprinkle delicate mounds of Parmesan cheese onto the prepared surface, leaving little breathing room between each dollop.
  • Gentle Shaping Using your fingertips, softly press down on each cheese heap, encouraging them to spread into delicate circles that will transform into elegant crisps.
  • Crispy Transformation Slide the tray into the heated oven and watch closely as the cheese melts and transforms into golden, lacy wafers that crackle with flavor.
  • Cooling and Serving Carefully remove the tray and let the crisps cool completely, allowing them to firm up into delightful, crunchy nibbles perfect for snacking or garnishing.

Tips and Variations for Ina Garten Parmesan Cheese Crisps

  • Experiment with different hard cheeses like aged cheddar, Pecorino Romano, or Asiago for unique flavor profiles and crispy textures.
  • Adjust the amount of cheese to create thinner, more delicate crisps or thicker, more substantial cheese crackers depending on your preference.
  • Sprinkle dried herbs like thyme, rosemary, or cracked black pepper before baking to enhance the overall taste and create gourmet-style cheese crisps.
  • Serve as a low-carb snack, elegant salad topper, charcuterie board accent, or crispy garnish for soups and creamy dishes to add instant crunch and sophistication.
  • Store completely cooled cheese crisps in an airtight container at room temperature for up to 3 days, keeping them away from moisture to maintain their delightful crispy texture.

Present and Serve Ina Garten Parmesan Cheese Crisps

  • Savor Alongside Soups: Crumble these crispy Parmesan crisps over a hot tomato soup or creamy vegetable bisque for an instant texture boost and cheesy flavor explosion.
  • Elevate Salad Crunch: Nestle these delicate cheese wafers on top of fresh green salads to add a sophisticated, salty crunch that transforms an ordinary salad into a gourmet experience.
  • Pair with Wine and Charcuterie: Arrange these golden cheese crisps on a wooden board next to cured meats, olives, and a selection of wines for an elegant appetizer that will impress guests and tantalize taste buds.
  • Create Unique Appetizer Base: Use these crisp cheese rounds as a delightful base for small canapés, topping them with herbed cream cheese, smoked salmon, or a dollop of tapenade for a quick and impressive party snack.

Storage Tips for Ina Garten Parmesan Cheese Crisps

  • Batch Prep Like a Pro: Make multiple cheese crisps in one go and store them in an airtight container for quick snacking throughout the week.
  • Cool and Crisp Storage: Let crisps completely cool at room temperature before transferring to a sealed container to maintain their crunchiness.
  • Refrigerate for Freshness: Keep cheese crisps in the refrigerator for up to 5 days, placing a paper towel inside the container to absorb moisture and prevent sogginess.
  • Revive Crispy Texture: Quickly reheat room temperature or refrigerated crisps in a toaster oven or air fryer for 1-2 minutes to restore their original crunch and warmth.

Quick Recipe Overview

Quick Recipe Overview

Prep Time: 3 minutes

Cook Time: 5 minutes

Total Time: 8 minutes

Calories: 560 kcal

Servings: 6

What You’ll Need for Ina Garten Parmesan Cheese Crisps

For Cheese Base:
  • Parmesan Cheese: Authentic aged cheese that delivers sharp, nutty flavor and creates deliciously crispy texture when baked.
For Baking Preparation:
  • Silicone Baking Sheet: Provides non-stick surface for even cheese spread and easy removal of crisps.
  • Parchment Paper: Alternative non-stick option for creating perfect cheese crisps without sticking.
For Optional Enhancements:
  • Black Pepper: Freshly ground pepper can add subtle spicy kick to complement cheese's richness.
  • Fresh Herbs: Finely chopped rosemary or thyme can introduce aromatic dimension to crisp's flavor profile.
Print
clock clock iconcutlery cutlery iconflag flag iconfolder folder iconinstagram instagram iconpinterest pinterest iconfacebook facebook iconprint print iconsquares squares iconheart heart iconheart solid heart solid icon
Crispy Ina Garten Parmesan Cheese Crisps Recipe

Crispy Ina Garten Parmesan Cheese Crisps Recipe


5 Stars 4 Stars 3 Stars 2 Stars 1 Star

4.7 from 8 reviews

  • Total Time: 8 minutes
  • Yield: 6 1x

Description

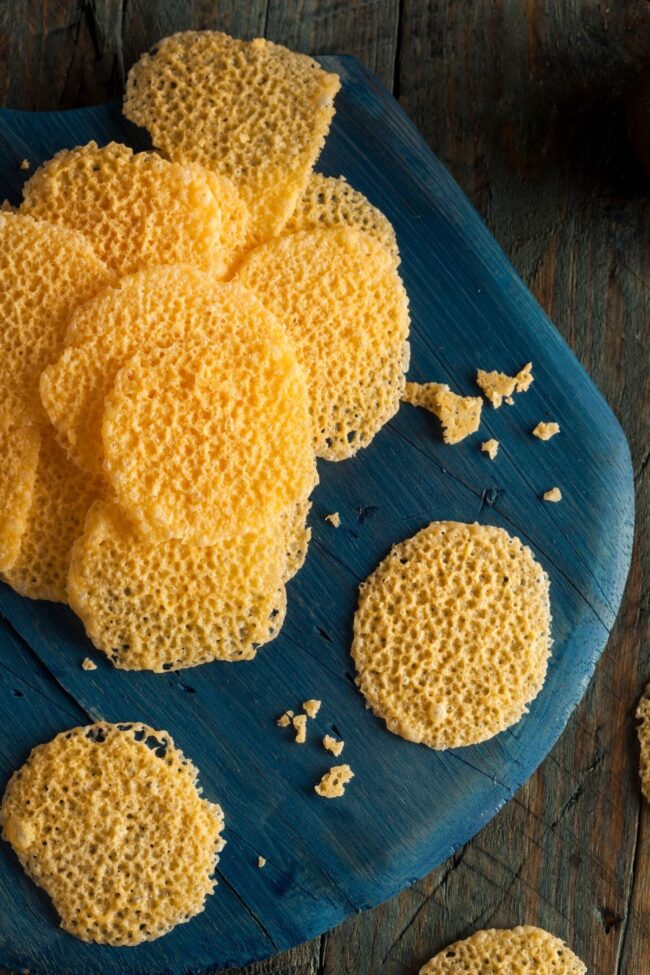
Parmesan cheese crisps elevate any appetizer spread with Ina Garten’s simple, elegant technique. Crisp, golden rounds provide a delightful crunch you’ll want to serve alongside salads, soups, or enjoy as a standalone snack.


Ingredients

Scale
  • 2 pounds (907 g) ground beef
  • 1 pound (454 g) pasta
  • 1 cup (240 ml) mozzarella cheese
  • ½ cup (120 ml) grated Parmesan cheese
  • 1 onion, diced
  • 3 cloves garlic, minced
  • 1 tsp dried basil
  • 1 tsp dried oregano
  • ½ tsp salt
  • ¼ tsp black pepper
  • 1 can (14.5 oz / 411 g) diced tomatoes
  • 1 can (15 oz / 425 g) tomato sauce
  • 2 tbsps tomato paste
  • 2 large eggs
  • ¼ cup (60 ml) milk

Instructions

  1. Temperature Preparation: Preheat the oven to 400°F (204°C), creating the ideal environment for transforming Parmesan into delicate, crispy wafers.
  2. Surface Setup: Cover a baking sheet with a silicone mat or parchment paper, ensuring a non-stick surface for effortless cheese crisp creation.
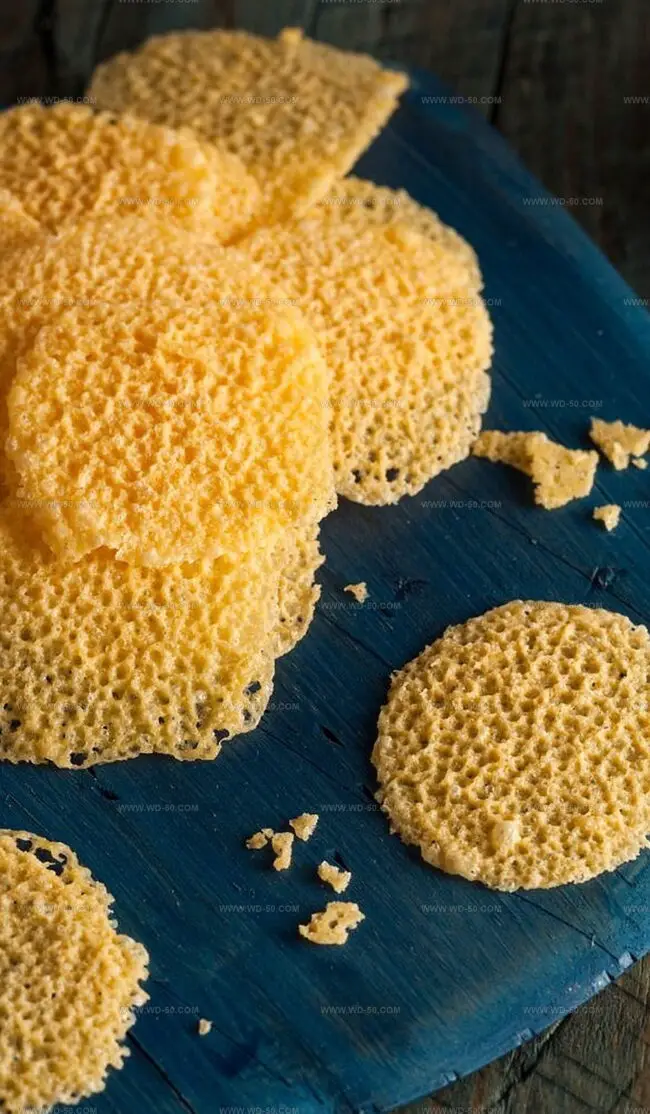
  3. Cheese Placement: Distribute tablespoon-sized Parmesan portions across the prepared surface, spacing them evenly to allow for proper melting and crisping. Gently flatten each mound using a spoon or fingertips to create thin, circular shapes that will develop a lacy texture.
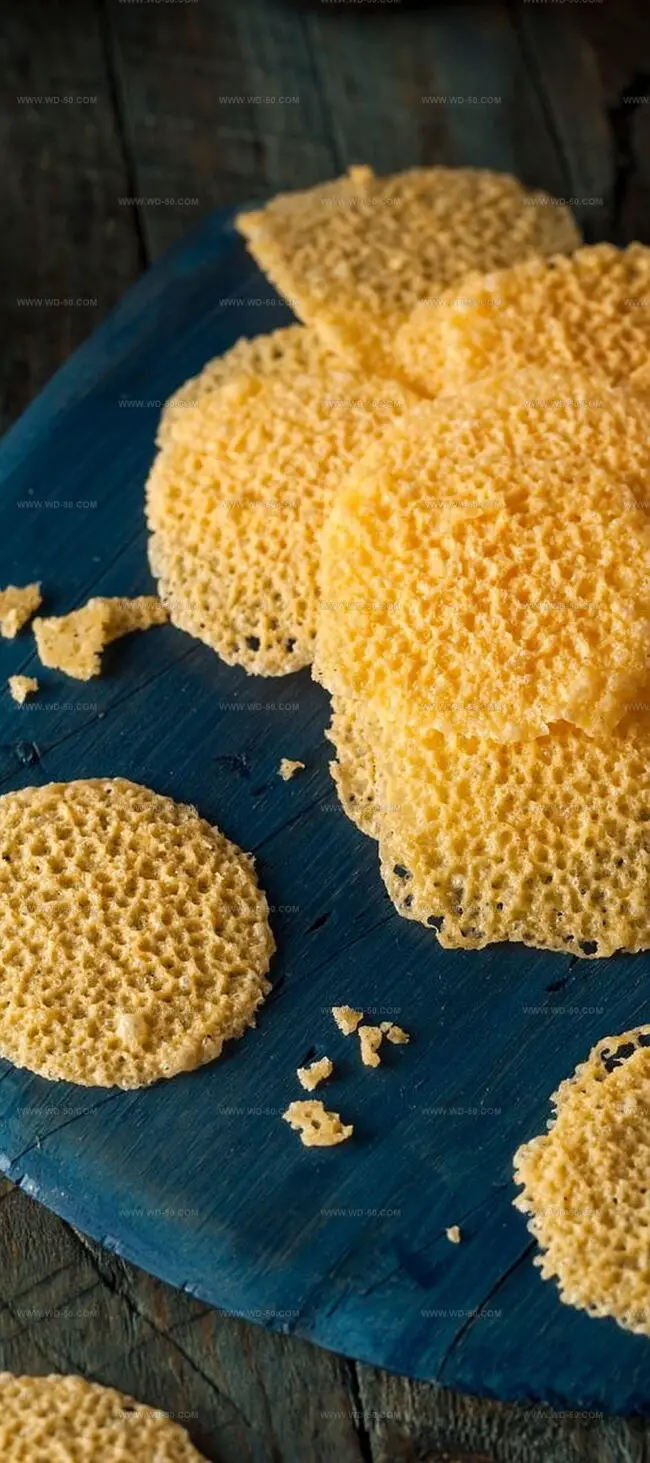
  4. Baking Process: Position the baking sheet on the center rack of the preheated oven. Observe the transformation carefully, allowing the cheese to melt and turn golden brown, typically requiring 3 to 5 minutes. Look for delicate amber edges and a translucent, lacy appearance as indicators of perfect doneness.
  5. Cooling and Handling: Immediately remove the baking sheet from the oven, letting the Parmesan crisps cool completely on the surface. As they cool, the wafers will solidify and develop a satisfying crunch. Once cooled, delicately lift the crisps using a thin spatula, preserving their intricate, fragile structure.

Notes

  • Cheese Quality Matters: Use freshly grated Parmesan for maximum flavor and optimal melting performance, avoiding pre-packaged shredded cheese.
  • Spacing is Critical: Leave enough room between cheese portions to prevent merging and ensure individual crisp formation.
  • Temperature Precision: Watch carefully during baking, as seconds can transform crisps from perfectly golden to burnt.
  • Storage Strategy: Store completely cooled crisps in an airtight container at room temperature to maintain crispness for 2-3 days.
  • Prep Time: 3 minutes
  • Cook Time: 5 minutes
  • Category: Snacks, Appetizer
  • Method: Baking
  • Cuisine: American

Nutrition

  • Serving Size: 6
  • Calories: 560
  • Sugar: 7 g
  • Sodium: 800 mg
  • Fat: 28 g
  • Saturated Fat: 10 g
  • Unsaturated Fat: 15 g
  • Trans Fat: 0 g
  • Carbohydrates: 42 g
  • Fiber: 3 g
  • Protein: 36 g
  • Cholesterol: 160 mg
Isabella Rodriguez

Isabella Rodriguez

Co-Founder & Content Creator

Expertise

Pastry Arts and Dessert Innovation, French and European Baking Techniques, Food Writing and Blogging, Culinary Event Planning

Education

Le Cordon Bleu Paris

  • Diploma: Grand Diplôme®
  • Focus: Intensive training in classic French cuisine and pastry techniques, combining the Diplôme de Cuisine and Diplôme de Pâtisserie.

Isabella Rodriguez is the co-founder and pastry chef at wd-50.com. She studied at Le Cordon Bleu in Paris, where she earned the Grand Diplôme®, a top award in both cooking and baking. After working in fancy bakeries and as a personal pastry chef, Isabella now shares her love for desserts in an easy way for home bakers to enjoy.

At wd-50.com, Isabella creates recipes for cookies, cakes, tarts, and more, always with clear steps and helpful tips. She believes baking should be fun, not stressful, and she hopes her recipes bring joy to your kitchen and smiles to your table.

Leave a Reply

Your email address will not be published. Required fields are marked *

Recipe rating 5 Stars 4 Stars 3 Stars 2 Stars 1 Star