
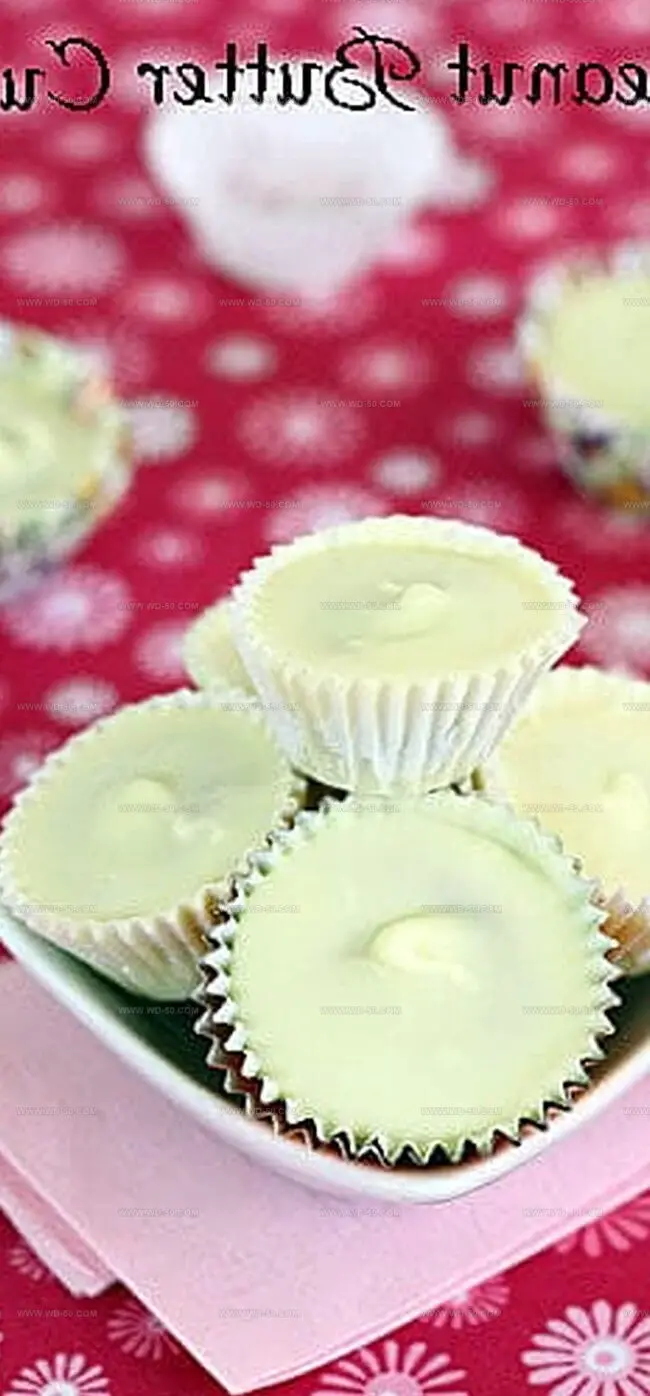
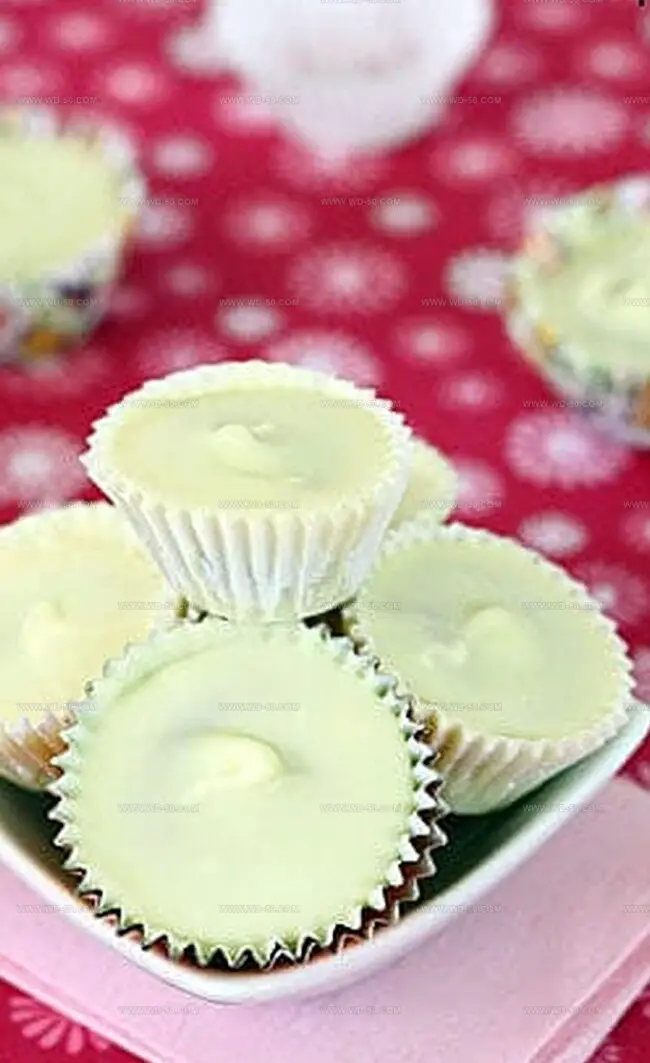
Dreamy White Chocolate Peanut Butter Cups Recipe for Sweet Fans
Indulgent desserts have a special way of stealing hearts, and these creamy white chocolate peanut butter cups will make taste buds dance with pure delight.
A classic combination of rich white chocolate and smooth peanut butter creates an irresistible treat that melts in your mouth.
Sweet meets salty in this decadent homemade confection that rivals any store-bought candy.
The recipe comes together with just a few simple ingredients, promising a quick and delectable experience.
Each bite delivers a perfect balance of sweetness and nutty flavor that will have everyone begging for more.
These cups are so simple to make, you’ll wonder why you haven’t tried them sooner.
Prepare to become the dessert hero among your friends with this mouthwatering chocolate and peanut butter sensation.
Quick Recipe Overview
White Chocolate Peanut Butter Cups Ingredients
For Base and Filling:For Coating:For Optional Garnish and Finishing:Tools for Homemade Peanut Butter Cups
How to Make White Chocolate Peanut Butter Treats
Blend creamy peanut butter with a touch of sweetness and vanilla in a cozy mixing bowl. Crush some roasted peanuts for extra crunch if you’re feeling adventurous. Pop the mixture in the refrigerator to chill and firm up while you tackle the next steps.
Carefully melt white chocolate using gentle heat, stirring constantly to create a smooth, silky texture. Pour a thin layer into delicate paper liners, making sure to coat the bottom and sides with a loving touch. Let these cool and set in the refrigerator until firm.
Scoop small dollops of the chilled peanut butter mixture into each chocolate-lined cup. Press gently to create a neat, even layer that doesn’t quite reach the top of the liner.
Drizzle the remaining melted white chocolate over the peanut butter layer, ensuring a smooth and elegant finish. Tap the tray gently to remove any air bubbles and create a flawless surface.
Place the treats in the refrigerator for a final set. Wait patiently as the layers merge into a delectable dessert that promises to melt hearts and tantalize taste buds.
Tips for Creamy Center and Perfect Coating
Serving Homemade White PB Cups with Ease
Storing White Chocolate PB Cups for Freshness
Print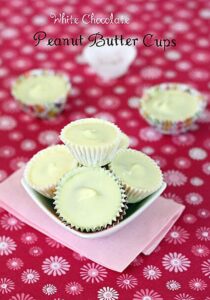
Decadent White Chocolate Peanut Butter Cups Recipe
- Total Time: 30 minutes
- Yield: 27 1x
Description
Homemade white chocolate peanut butter cups deliver pure indulgence for chocolate enthusiasts. Rich layers of creamy peanut butter nestled in smooth white chocolate create a delightful treat you can savor with pure bliss.
Ingredients
- 18 oz (510 g) white chocolate (like Callebaut)
- 1 cup (255 g) peanut butter (not natural or reduced fat)
- 1 cup (120 g) confectioners’ sugar
- 3 tbsps (45 ml) honey
- ½ tsp (2.5 ml) vanilla extract
- ½ cup (75 g) chopped salted peanuts (optional)
- ½ to 1 tsp (2.5 to 5 g) coarse salt (optional)
Instructions
- Prepare Filling: Thoroughly blend peanut butter, honey or sugar, vanilla extract, salt, and optional chopped peanuts in a medium bowl. Adjust seasoning to taste, then chill for 15 minutes to slightly firm the mixture.
- Chocolate Base: Establish a double boiler or use a microwave-safe bowl to melt white chocolate carefully. Stir in 15-second intervals to prevent scorching, ensuring a silky smooth texture.
- Mold Preparation: Arrange mini muffin tin with paper or aluminum candy cups. Delicately coat each liner’s bottom and sides with melted white chocolate, creating a thin foundation. Refrigerate until completely hardened.
- Filling Assembly: Extract chilled peanut butter mixture and distribute small portions into each chocolate-lined cup. Press gently, leaving minimal space at the top for final chocolate layer.
- Final Coating: Warm remaining white chocolate if needed. Pour over peanut butter filling, guaranteeing complete coverage. Gently tap the tin to eliminate air bubbles and achieve a pristine surface.
- Setting: Return filled cups to refrigerator and allow 30-45 minutes for complete solidification. Serve chilled for optimal texture and flavor.
Notes
- Chocolate Coating Technique: Use gentle, slow melting to prevent burning white chocolate, stirring consistently for smooth texture.
- Peanut Butter Consistency: Refrigerate mixture briefly to create firmer filling that’s easier to handle and shape inside chocolate cups.
- Temperature Control: Allow chocolate layers to fully set in refrigerator between steps to maintain distinct layers and prevent melting.
- Filling Precision: Leave small gap when adding peanut butter filling to ensure clean, neat top chocolate layer when final coating is added.
- Prep Time: 25 minutes
- Cook Time: 5 minutes
- Category: Snacks, Desserts
- Method: Melting
- Cuisine: American
Nutrition
- Serving Size: 27
- Calories: 179
- Sugar: 14 g
- Sodium: 78 mg
- Fat: 11 g
- Saturated Fat: 4 g
- Unsaturated Fat: 7 g
- Trans Fat: 0 g
- Carbohydrates: 18 g
- Fiber: 1 g
- Protein: 3 g
- Cholesterol: 0 mg
Michael Reynolds
Founder, Head Recipe Developer & Cuisine Specialist
Expertise
Recipe Development and Testing, Modern American and European Cuisines, Food Styling and Photography, Culinary Education and Workshops
Education
Johnson & Wales University
Auguste Escoffier School of Culinary Arts
Michael Reynolds is the founder and head recipe creator at wd-50.com. With over 15 years of experience in the kitchen, he’s spent time working in top restaurants and now focuses on making great food easy for everyone at home.
Michael studied culinary arts at Johnson & Wales University and later trained in pastry at the Auguste Escoffier School. He knows his way around both savory meals and sweet treats.
At wd-50.com, his goal is to help you feel confident in the kitchen, whether you’re trying something new or cooking a favorite dish. He loves using fresh ingredients and simple steps that still bring out big flavors.