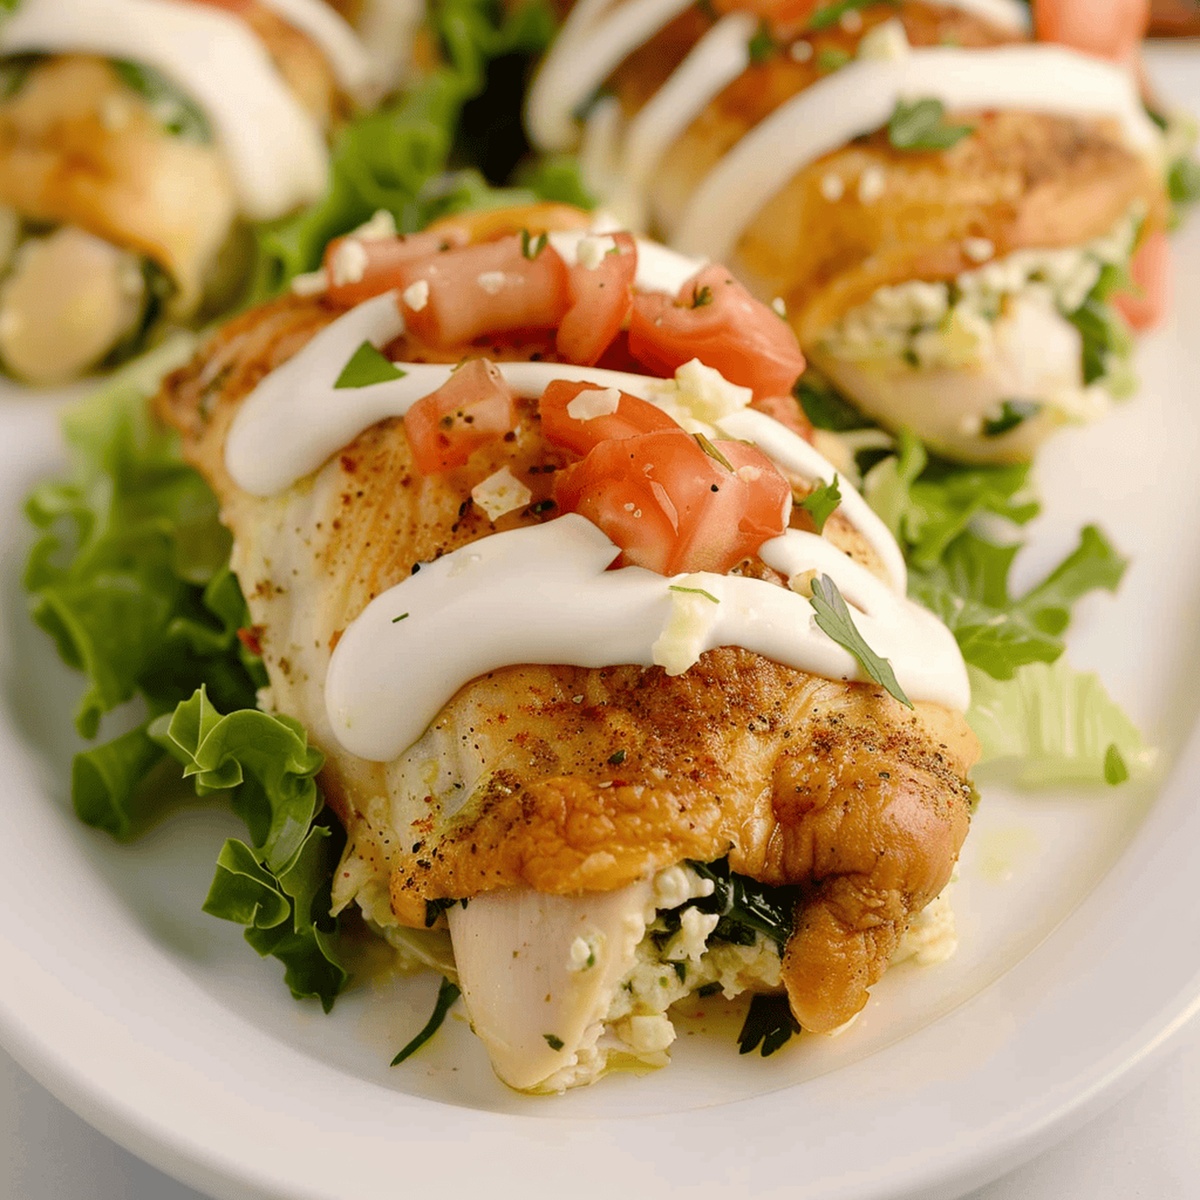
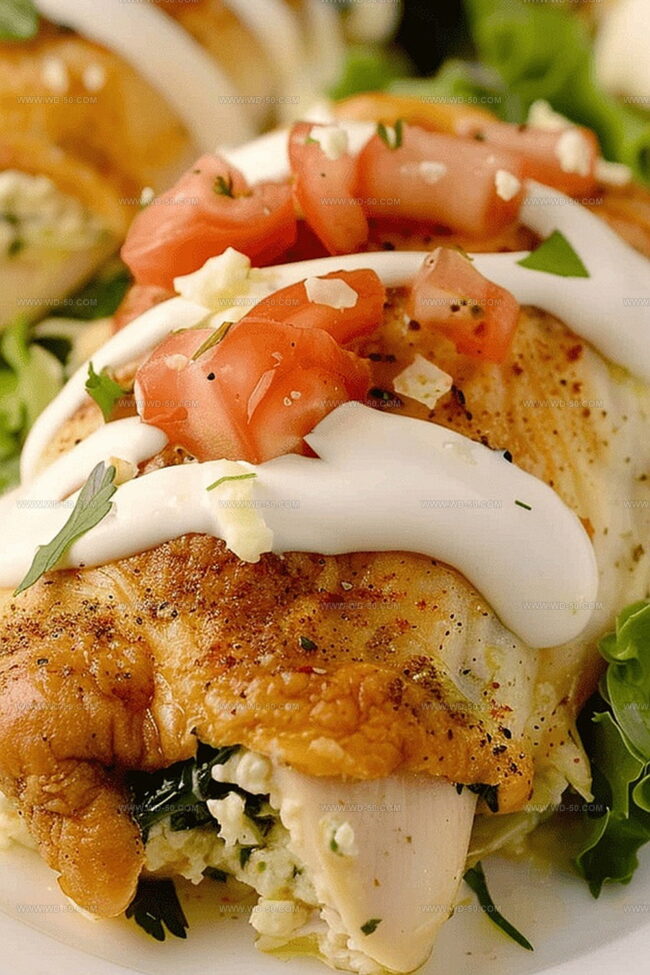
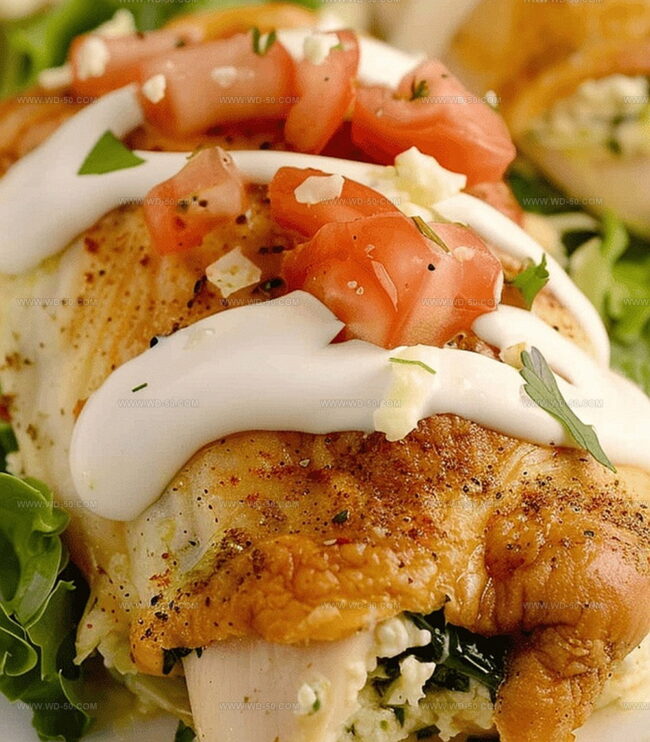
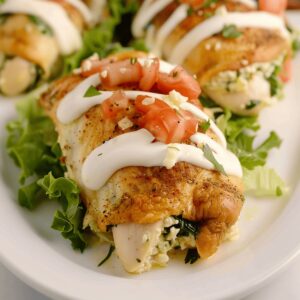
Sizzling and golden, these delectable chicken mini chimichangas burst with flavor that’ll make your taste buds dance.
Tucked inside a crispy tortilla shell, the perfectly seasoned chicken mini chimichangas promise a delightful crunch in every bite.
Layers of tender chicken, melted cheese, and zesty spices create a mouthwatering filling that turns an ordinary meal into a fiesta.
Each mini chimichanga is a handheld treasure, packed with bold Mexican-inspired ingredients that sing with excitement.
The secret lies in the careful balance of spices and the technique that transforms simple ingredients into a crowd-pleasing appetizer or main dish.
Whether you’re hosting a game night or simply seeking a delicious treat, these mini chimichangas will steal the show and leave everyone asking for seconds.
Let’s find out this recipe and let the culinary adventure begin!
Quick Recipe Overview
Prep Time: 20 minutes
Cook Time: 30 minutes
Total Time: 50 minutes
Calories: 374 kcal
Servings: 7
Ingredients to Make Crispy Chicken Mini Chimichangas
For Protein and Flavor Base:
Shredded Cooked Chicken: Select tender rotisserie or boiled chicken for a succulent and easy protein foundation that absorbs spices beautifully.
Taco Seasoning: Delivers a zesty and robust Southwestern flavor profile that elevates the chicken’s taste with its signature spice blend.
For Texture and Melting Components:
Monterey Jack Cheese: Provides creamy, mild melting quality that binds ingredients and creates a luxurious interior for the chimichangas.
Corn Kernels: Adds sweet crunch and textural interest, bringing brightness and subtle sweetness to the filling.
For Aromatic and Flavor Enhancers:
Poblano Pepper: Introduces mild, smoky heat and deep green pepper complexity to the filling.
Onion: Contributes sweet, sharp undertones that build depth in the overall flavor profile.
Garlic: Infuses intense, pungent notes that complement the other ingredients.
Red Salsa: Introduces tangy moisture and additional spicy dimensions to the chicken mixture.
Salt and Freshly Ground Black Pepper: Balances and heightens all flavor elements in the filling.
Olive Oil: Helps with browning and adds a subtle fruity undertone during cooking.
Tool for Frying or Baking Chicken Chimichangas
Large skillet: Perfect for sautéing vegetables and creating flavorful fillings.
Mixing bowl: Essential for combining chicken, seasonings, and other ingredients.
Baking sheet: Provides a sturdy surface for assembling and baking chimichangas.
Parchment paper or cooking spray: Ensures easy release and prevents sticking.
Pastry brush: Helps evenly coat tortillas with olive oil for extra crispiness.
Measuring cup: Helps portion the filling accurately for consistent chimichangas.
Spatula or spoon: Useful for mixing ingredients and transferring filling.
Steps for Perfect Mini Chicken Chimichangas
Oven Preparation Warm up the kitchen and get your baking sheet ready with a light coating of grease or parchment paper.
Veggie Sizzle Toss garlic, onion, and poblano pepper into a hot skillet, letting them dance and release their delicious aromas until soft and fragrant.
Corn and Mixture Blend corn into the skillet, then transfer the colorful medley to a spacious mixing bowl.
Flavor Fusion Combine shredded chicken with zesty seasonings, spicy salsa, and melty cheese, stirring gently to create a mouthwatering filling.
Wrap and Fold Scoop the savory mixture into tortillas, tucking and rolling them into neat little bundles, then nestle them seam-side down on the baking sheet.
Golden Crunch Brush the tops with a kiss of olive oil, then slide into the oven until they transform into crispy, golden treasures.
Serve and Enjoy Pull out these crunchy delights and pair with fresh avocado sauce or zesty pico de gallo for a flavor explosion.
Ideas to Spice Up Your Chimichangas
Smart Tricks and Twists
Choose flour tortillas that are fresh and soft for easier folding without cracking, ensuring a perfect seal for your filling.
Swap chicken with shredded beef, pulled pork, or black beans for vegetarian friends, keeping the same delicious seasoning profile.
Mix in different cheese varieties like pepper jack, monterey jack, or queso fresco to create unique flavor dimensions that complement the chicken.
Adjust heat by selecting mild, medium, or hot salsa and taco seasoning, letting everyone enjoy their preferred spice intensity without overwhelming the dish.
Prepare a double batch and freeze uncooked chimichangas between parchment paper layers, baking directly from frozen with an extra 10-15 minutes cooking time for a quick future meal.
Serving Mini Chimichangas at Parties or Lunch
Zesty Party Platter: Arrange chimichangas on a colorful wooden board with small bowls of salsa, sour cream, and guacamole for a festive gathering that encourages sharing and interactive eating.
Fresh Fiesta Sides: Complement the crispy chimichangas with a bright cilantro-lime rice and refreshing black bean salad to balance the rich, savory flavors and add nutritional variety to the meal.
Casual Game Night Spread: Serve these mini chimichangas as bite-sized appetizers during movie marathons or sports events, making them perfect finger food that keeps everyone satisfied without interrupting the entertainment.
Family-Style Mexican Feast: Create a build-your-own station where guests can top their chimichangas with different sauces, chopped herbs, and additional cheese, turning dinner into a fun, personalized experience.
Storing Chimichangas and Making Ahead Tips
Smart Batch Cooking: Whip up a double batch of chimichangas and freeze half for quick future meals. These tasty bites store beautifully in airtight containers and maintain their crunch when reheated correctly.
Fridge Fresh Storage: Keep leftover chimichangas in sealed containers for up to 3-4 days. Slide a paper towel inside to absorb excess moisture and maintain their crispy texture.
Quick Reheat Technique: Revive refrigerated chimichangas by placing them in a preheated oven at 350°F for 10-12 minutes. Avoid microwave reheating to prevent soggy tortillas and preserve their delightful crispiness.
Make-Ahead Magic: Prepare filling and assemble chimichangas up to 24 hours before baking. Keep them covered in the refrigerator, then pop into the oven when ready to enjoy a fresh, hot meal with minimal prep time.
Delectable chicken mini chimichangas elevate Mexican-inspired appetizers with crispy golden exteriors and savory fillings. Creamy cheese and tender chicken blend perfectly, promising a delightful bite you’ll savor in each crunchy, satisfying morsel.
Ingredients
Scale
3 cups (710 ml) shredded cooked chicken, rotisserie or boiled
6 oz (170 g) shredded monterey jack cheese
1 tbsp (15 ml) taco seasoning
½ cup (120 ml) red salsa
½ cup (120 ml) corn kernels
½ cup (120 ml) poblano pepper, seeded and diced
⅓ cup (80 ml) onion, chopped
2 cloves garlic, minced
2 tbsps (30 ml) olive oil
Salt, to taste
Freshly ground black pepper, to taste
Instructions
Prep Aromatics: Sauté garlic, onions, and poblano peppers in a medium-heat skillet until fragrant and translucent, releasing their vibrant flavors.
Build Vegetable Base: Add sweet corn kernels to the skillet, cooking briefly to enhance their natural sweetness, then transfer the aromatic mixture to a large mixing bowl.
Compose Filling: Integrate shredded chicken, taco seasoning, salsa, cheese, salt, and pepper into the vegetable base, gently folding to create a harmonious and well-distributed mixture.
Wrap Chimichangas: Carefully spread the flavorful filling onto soft flour tortillas, rolling them into compact bundles with sealed edges.
Prepare for Baking: Arrange wrapped chimichangas seam-side down on a parchment-lined baking sheet, lightly brushing exteriors with olive oil to ensure a golden, crisp finish.
Roast to Perfection: Bake in a preheated 375°F (190°C) oven for 25-30 minutes, rotating midway to achieve an evenly bronzed, crunchy exterior.
Serve and Enjoy: Allow chimichangas to rest briefly, then plate with zesty avocado sauce or fresh pico de gallo for a vibrant culinary presentation.
Notes
Prep Like a Pro: Ensure all ingredients are room temperature for even cooking and better flavor blending.
Oil Brushing Technique: Use a silicone brush for uniform olive oil coating, preventing dry or overly greasy spots on tortillas.
Cheese Melting Hack: Mix cheese while filling is slightly warm to help it melt and bind ingredients seamlessly.
Crispy Surface Secret: Place chimichangas on a wire rack after baking for 2-3 minutes to maintain crispiness and prevent soggy bottoms.
Founder, Head Recipe Developer & Cuisine Specialist
Expertise
Recipe Development and Testing, Modern American and European Cuisines, Food Styling and Photography, Culinary Education and Workshops
Education
Johnson & Wales University
Degree: Bachelor of Science in Culinary Arts
Focus: Comprehensive training in classical and modern cooking techniques, kitchen management, and global cuisines.
Auguste Escoffier School of Culinary Arts
Program: Diploma in Pastry Arts
Focus: Specialized education in baking and pastry, emphasizing artisanal bread, confections, and plated desserts.
Michael Reynolds is the founder and head recipe creator at wd-50.com. With over 15 years of experience in the kitchen, he’s spent time working in top restaurants and now focuses on making great food easy for everyone at home.
Michael studied culinary arts at Johnson & Wales University and later trained in pastry at the Auguste Escoffier School. He knows his way around both savory meals and sweet treats.
At wd-50.com, his goal is to help you feel confident in the kitchen, whether you’re trying something new or cooking a favorite dish. He loves using fresh ingredients and simple steps that still bring out big flavors.
Michael Reynolds
Founder, Head Recipe Developer & Cuisine Specialist
Expertise
Recipe Development and Testing, Modern American and European Cuisines, Food Styling and Photography, Culinary Education and Workshops
Education
Johnson & Wales University
Auguste Escoffier School of Culinary Arts
Michael Reynolds is the founder and head recipe creator at wd-50.com. With over 15 years of experience in the kitchen, he’s spent time working in top restaurants and now focuses on making great food easy for everyone at home.
Michael studied culinary arts at Johnson & Wales University and later trained in pastry at the Auguste Escoffier School. He knows his way around both savory meals and sweet treats.
At wd-50.com, his goal is to help you feel confident in the kitchen, whether you’re trying something new or cooking a favorite dish. He loves using fresh ingredients and simple steps that still bring out big flavors.