When bakers stumble upon this no fuss pie crust recipe, they often marvel at its simplicity and incredible results.
Crafting a perfect pastry doesn’t require culinary magic or complicated techniques.
This foolproof method breaks down barriers for home cooks who typically avoid making pie dough from scratch.
With just a few basic ingredients and minimal effort, you can create a buttery, flaky crust that rivals any store-bought version.
The secret lies in keeping ingredients cold and handling the dough with a light touch.
Crisp and golden, this pie crust will become your go-to recipe for both sweet and savory treats.
Roll up your sleeves and get ready to impress everyone at the table with your baking prowess.
Quick Recipe Overview
Prep Time: 10 minutes
Cook Time: 0 minutes
Total Time: 10 minutes
Calories: 600 kcal
Servings: 2
Ingredients in No Fuss Pie Crust
For Dry Base:
All-Purpose Flour: Provides sturdy foundation for the pie crust, ensuring a crisp and reliable texture that holds together perfectly.
Baking Powder: Gives a gentle lift and subtle airiness to the crust, preventing it from becoming dense and heavy.
For Moisture and Binding:
Vegetable Oil, Canola Oil, Olive Oil: Delivers rich, smooth consistency and helps create a tender, flaky crust with a hint of flavor variation depending on the oil chosen.
Cold Water: Crucial for bringing the dough together, helping ingredients blend seamlessly and creating a workable texture.
For Flavor Enhancement:
Salt: Balances and amplifies the overall taste, adding depth and preventing the crust from tasting flat or bland.
Equipment to Make No Fuss Pie Crust Easily
Pie Dish (9-inch): Essential for shaping and baking the pie crust.
Large Mixing Bowl: Perfect for combining dry ingredients and creating the dough.
Whisk: Helps mix flour, salt, and baking powder evenly.
Measuring Cups and Spoons: Crucial for accurate ingredient measurements.
Spatula or Wooden Spoon: Great for stirring and blending ingredients smoothly.
Nonstick Spray: Ensures easy pie crust removal and prevents sticking.
Clean Hands: Helpful for pressing and shaping the dough into the pie dish.
How to Prepare No Fuss Pie Crust from Scratch
Preparation Space A clean, flat surface awaits your culinary adventure. Gather your mixing bowl, rolling area, and a trusty pie dish ready for transformation.
Flour Foundation Blend flour with a whisper of salt and baking powder. These dry ingredients become the secret landscape of your delectable creation.
Liquid Magic Drizzle oil and cold water into your flour mixture. Gently coax the ingredients into a soft, pliable dough that feels smooth and cooperative.
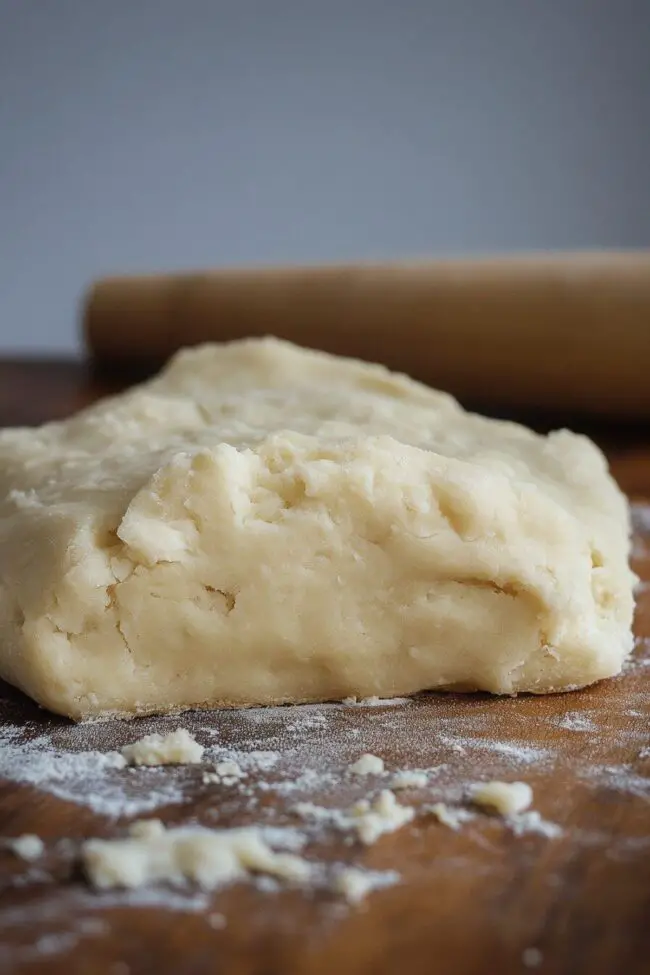
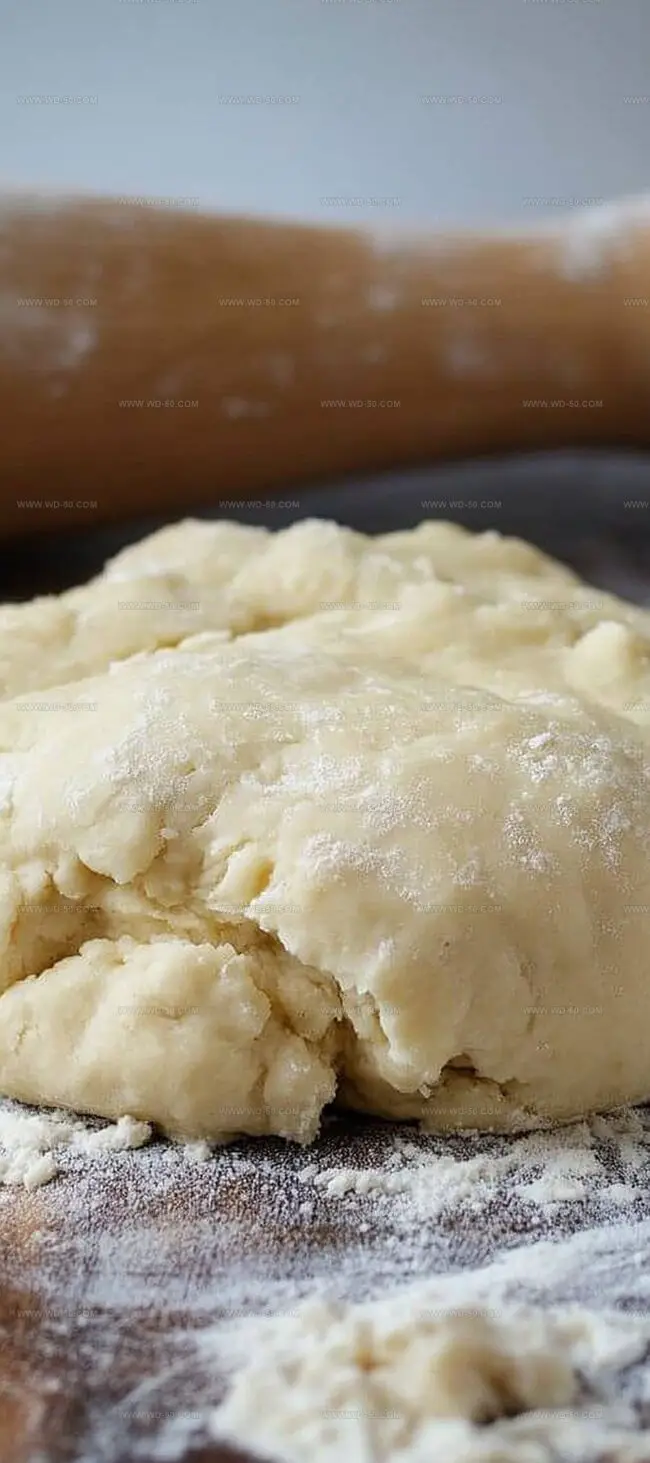
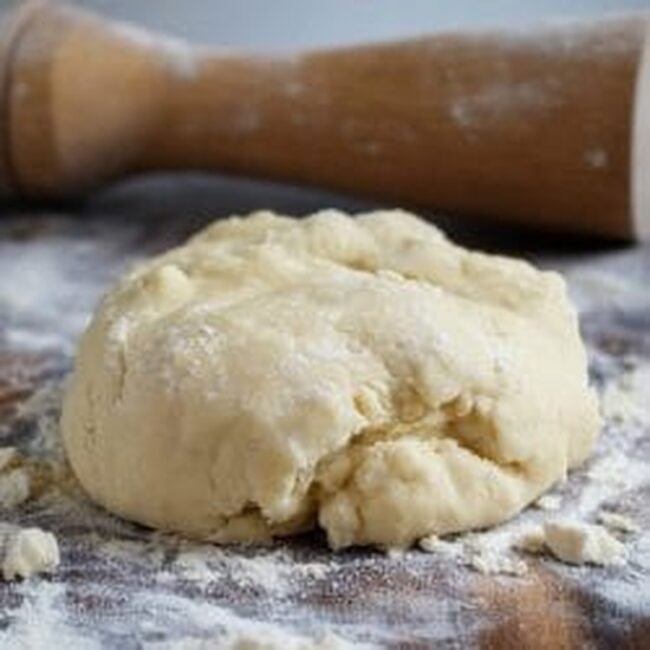
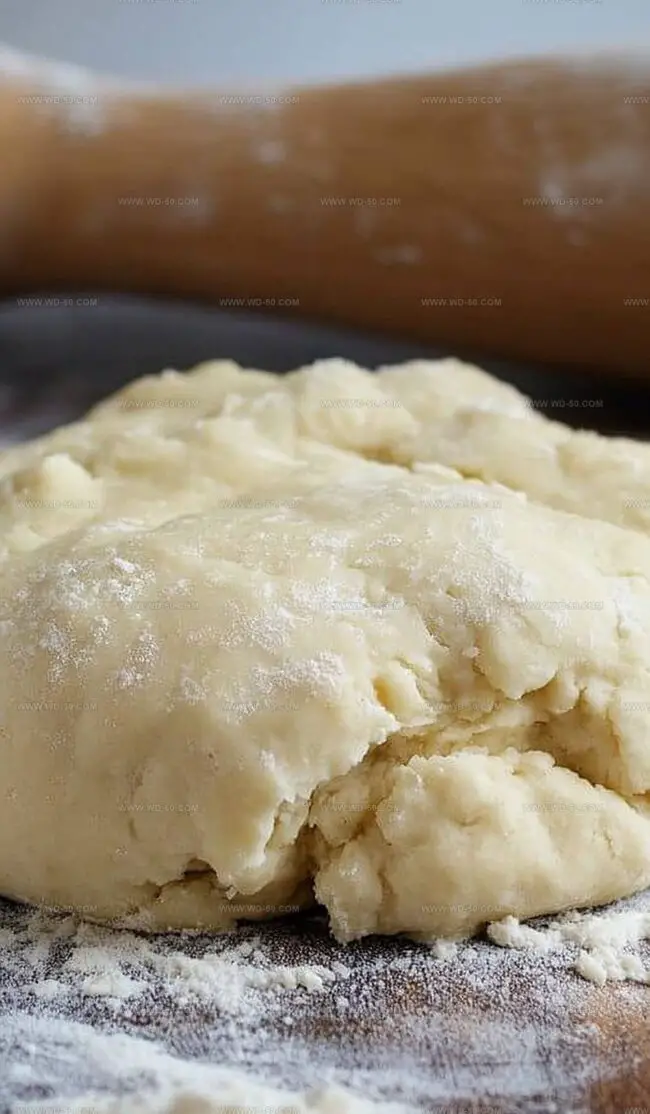
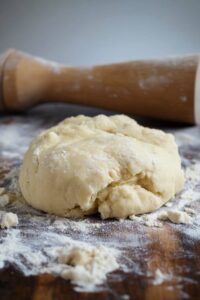
Dough Shaping Tenderly work the dough until it becomes a cohesive ball that holds together with gentle pressure. This is where texture meets technique.
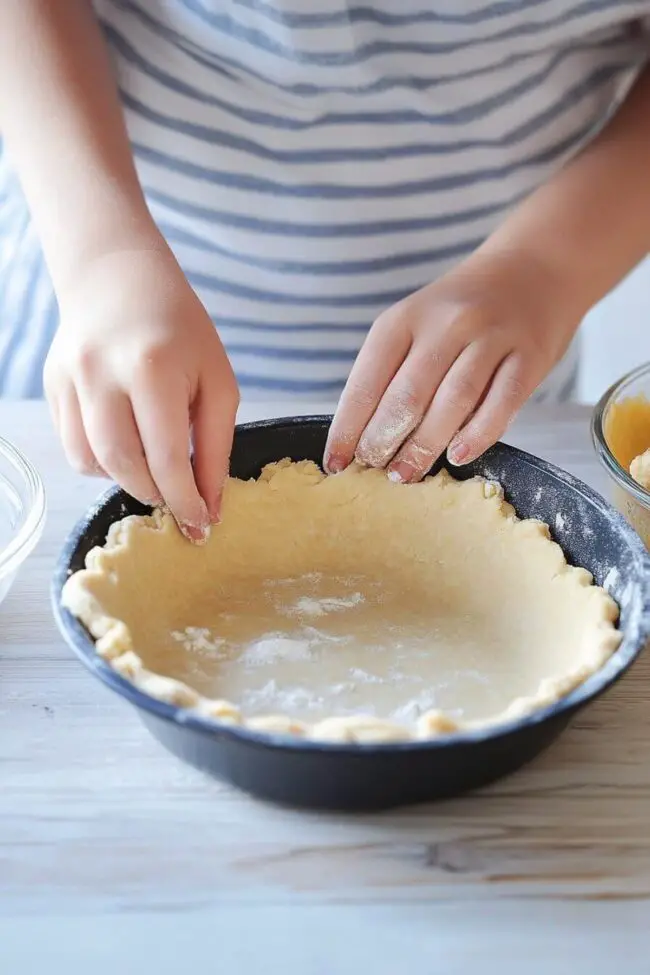
Canvas Placement Press the dough into your pie dish, allowing it to embrace the curves and edges. Create decorative borders that showcase your personal culinary style.
Ready for Adventure Your pie canvas is now prepared for whatever delicious filling your heart desires, waiting to be transformed in the warmth of the oven.
Tips for No Fuss Pie Crust
Expert Tips and Tasty Twists
Chill your water in the refrigerator for 15 minutes before mixing to ensure a flakier, more tender crust that won’t become tough or dense.
Experiment with whole wheat or gluten-free flour blends for a unique texture and nutritional boost, adjusting liquid amounts slightly to maintain perfect consistency.
Mix in dried herbs like thyme or rosemary, or sprinkle grated parmesan cheese into the dry ingredients for a savory crust that elevates sweet or savory fillings.
Wrap the unbaked pie crust tightly in plastic wrap and refrigerate for up to 2 days or freeze for 1 month, giving you a quick head start on meal preparation.
Brush the outer rim with beaten egg or milk before baking to create a golden, glossy finish that looks professionally created and adds extra richness to your pie.
Serving and Using No Fuss Pie Crust
Rustic Pie Perfection: Transform your homemade pie crust into a delightful culinary experience with these serving suggestions.
Family Dessert Delight: Pair this versatile crust with classic apple pie, topping it with a scoop of vanilla ice cream for a comforting sweet treat that brings everyone to the table.
Savory Pie Adventure: Experiment with hearty fillings like chicken pot pie or creamy quiche, creating a satisfying meal that showcases the crust’s flaky, tender texture.
Seasonal Celebration Plate: Dress up your pie with fresh seasonal fruits, a sprinkle of cinnamon, or a drizzle of caramel sauce to elevate the presentation and add extra flavor layers that will impress your guests.
Storage Tips for No Fuss Pie Crust Dough
Refrigerator Rest Zone: Store your unbaked pie crust wrapped tightly in plastic wrap for up to 3 days in the refrigerator. Keeping it chilled helps maintain its texture and prevents unwanted bacterial growth.
Freezer-Friendly Technique: Wrap the raw dough in double layers of plastic wrap and aluminum foil to freeze for 2-3 months. When ready to use, thaw slowly in the refrigerator overnight for best results.
Make-Ahead Magic: Prepare multiple pie crusts in advance and stack them between sheets of parchment paper. This strategy saves time during busy cooking weeks and ensures you’re always ready for spontaneous baking adventures.
Smart Serving Tip: Once baked, cover your pie loosely with aluminum foil and store in the refrigerator for 3-4 days. Always bring to room temperature before serving to restore the crust’s original delightful texture and flavor profile.
Grandma’s no fuss pie crust recipe delivers flaky, buttery perfection with minimal kitchen effort. Bakers can create delicious pastry quickly using simple ingredients and straightforward techniques.
Ingredients
Scale
2 cups (480 ml / 16 fl oz) all-purpose flour
¼ tsp baking powder
¼ tsp salt
¼ cup (60 ml / 2 fl oz) vegetable, canola, or olive oil
3 tbsps (45 ml / 1.5 fl oz) cold water
Instructions
Preparation: Spritz a 9-inch pie dish with nonstick cooking spray to prevent adhesion during baking.
Dry Ingredient Fusion: Whisk flour, salt, and baking powder in a large mixing bowl until thoroughly blended, creating a uniform dry base.
Liquid Integration: Form a central depression in the dry mixture, then gently introduce cold water and oil, gradually incorporating them using a fork or spatula until a soft, slightly textured dough emerges.
Dough Conditioning: Tenderly knead the mixture with clean hands, applying gentle pressure to transform the crumbly texture into a compact, smooth ball that maintains structural integrity.
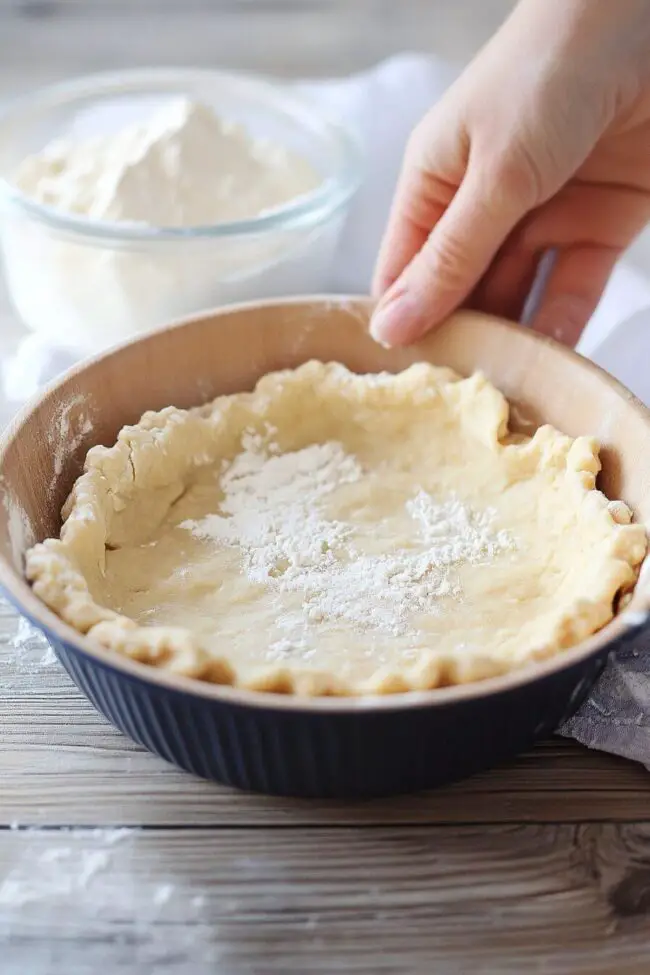
Crust Deployment: Carefully transfer the dough into the prepared pie dish, using fingertips to distribute the mixture evenly across the bottom and sides, ensuring complete coverage and a consistent thickness.
Aesthetic Finishing: Sculpt the crust’s perimeter by crafting an elegant crimped or scalloped edge, enhancing both visual appeal and structural stability.
Filling Preparation: The pie crust is now primed and ready for your selected filling, awaiting final baking instructions specific to your chosen recipe.
Notes
Chill Dough Wisely: Refrigerate the dough for 15-30 minutes before pressing into the pie dish to prevent shrinking and create a flakier texture.
Master Moisture Balance: Add water gradually to avoid a sticky or dry dough; the perfect consistency should hold together without crumbling.
Handle with Care: Use light, gentle touches when kneading and pressing the dough to prevent tough, dense crust development.
Prevent Soggy Bottom: Pre-bake the crust for 10-12 minutes at 375°F for cream or no-bake fillings to ensure a crisp, golden base.
Founder, Head Recipe Developer & Cuisine Specialist
Expertise
Recipe Development and Testing, Modern American and European Cuisines, Food Styling and Photography, Culinary Education and Workshops
Education
Johnson & Wales University
Degree: Bachelor of Science in Culinary Arts
Focus: Comprehensive training in classical and modern cooking techniques, kitchen management, and global cuisines.
Auguste Escoffier School of Culinary Arts
Program: Diploma in Pastry Arts
Focus: Specialized education in baking and pastry, emphasizing artisanal bread, confections, and plated desserts.
Michael Reynolds is the founder and head recipe creator at wd-50.com. With over 15 years of experience in the kitchen, he’s spent time working in top restaurants and now focuses on making great food easy for everyone at home.
Michael studied culinary arts at Johnson & Wales University and later trained in pastry at the Auguste Escoffier School. He knows his way around both savory meals and sweet treats.
At wd-50.com, his goal is to help you feel confident in the kitchen, whether you’re trying something new or cooking a favorite dish. He loves using fresh ingredients and simple steps that still bring out big flavors.

Michael Reynolds
Founder, Head Recipe Developer & Cuisine Specialist
Expertise
Recipe Development and Testing, Modern American and European Cuisines, Food Styling and Photography, Culinary Education and Workshops
Education
Johnson & Wales University
Auguste Escoffier School of Culinary Arts
Michael Reynolds is the founder and head recipe creator at wd-50.com. With over 15 years of experience in the kitchen, he’s spent time working in top restaurants and now focuses on making great food easy for everyone at home.
Michael studied culinary arts at Johnson & Wales University and later trained in pastry at the Auguste Escoffier School. He knows his way around both savory meals and sweet treats.
At wd-50.com, his goal is to help you feel confident in the kitchen, whether you’re trying something new or cooking a favorite dish. He loves using fresh ingredients and simple steps that still bring out big flavors.