
Ina Garten’s Dreamy Milk Chocolate Oreo Ice Cream Recipe
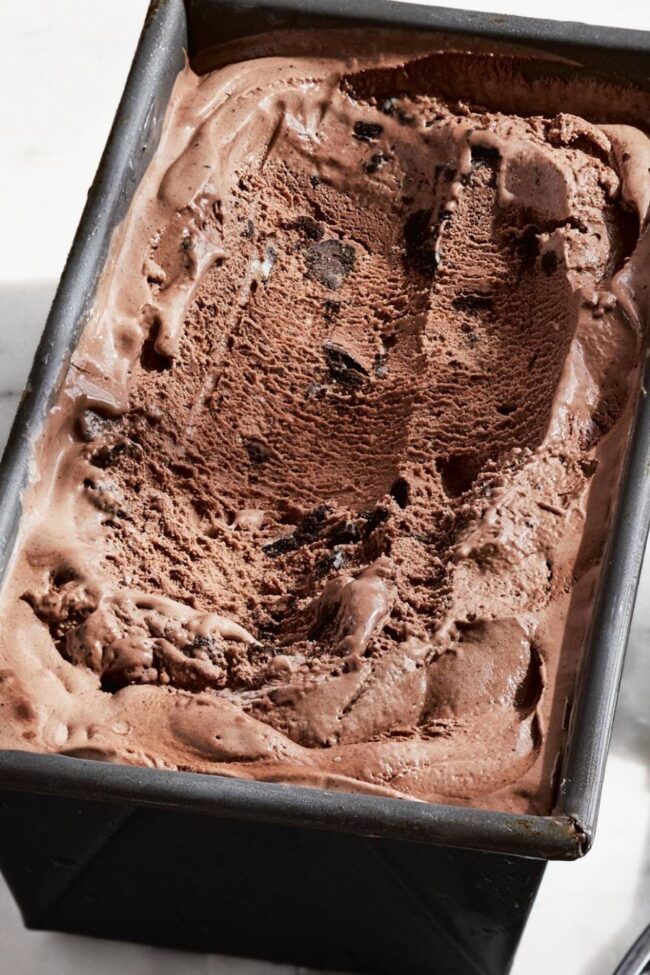
Milk chocolate Oreo ice cream promises a decadent journey through silky, rich textures that dance between sweet and creamy sensations.
Sweet crumbles of chocolatey cookies nestle within a luxurious frozen landscape, transforming ordinary dessert moments into extraordinary experiences.
Delicate chocolate notes intertwine with smooth, velvety cream, creating a sophisticated blend that teases sophisticated palates.
These classic flavor combinations spark joy and comfort, connecting us with childhood memories of indulgent snacks.
Sophisticated yet playful, this dessert represents a perfect harmony of culinary craftsmanship and nostalgic delight.
Professional techniques transform simple ingredients into a remarkable frozen experience that sparks conversation and creates lasting impressions: get ready to savor every spoonful.
Why Milk Chocolate Oreo Ice Cream Is a Frozen Dream
Ingredients to Make This Creamy, Crunchy Treat
Chocolate Base:Custard Components:Mix-In:How to Whip Up Ina’s Oreo Ice Cream at Home

Step 1: Melt The Chocolate Goodness
Gather these delightful ingredients:Create a double boiler by placing a heatproof bowl over simmering water. Gently melt chocolate with cream, stirring until smooth. Remove from heat and whisk in cocoa powder, vanilla, and Cognac. Set aside to cool.
Step 2: Craft The Creamy Custard Base
Collect these magical components:Warm milk, sugar, and salt in a saucepan until hot. In a separate bowl, whisk egg yolks with cornstarch. Slowly pour hot milk into egg mixture, whisking constantly. Return to saucepan and cook on low heat, stirring continuously until mixture thickens like heavy cream. Watch carefully to prevent boiling.
Step 3: Blend And Chill The Mixture
Strain the custard through a fine-mesh sieve into the chocolate mixture. Stir until completely combined. Refrigerate until thoroughly chilled, preferably for 2-3 hours.
Step 4: Churn With Oreo Magic
Transfer chilled mixture to an ice cream maker. Freeze according to machine instructions. During the last few minutes of churning, sprinkle in chopped Oreo cookies.
Step 5: Freeze And Enjoy
Pour churned ice cream into a freezer-safe container. Cover and freeze until firm. Let soften slightly before serving for the most luxurious scooping experience.
Tips for the Perfect Texture and Swirl
Keep Ice Cream Creamy in the Freezer
Tasty Add-Ins for Your Ice Cream Batch
Final Scoop of Chocolate Cookie Joy
Chocolate lovers rejoice!
Ina Garten’s milk chocolate Oreo ice cream weaves pure culinary magic through classic ingredients and expert technique.
Sophisticated flavors dance across palates with rich chocolate undertones and crunchy Oreo surprises.
Creamy custard foundations provide luxurious texture that elevates this dessert beyond ordinary expectations.
Complex notes of Cognac whisper subtle sophistication through each delightful spoonful.
Home cooks can recreate restaurant-quality indulgence with straightforward steps and minimal equipment.
Savor each moment, share this masterpiece, spread deliciousness, and inspire fellow dessert enthusiasts to explore gourmet possibilities!
Print
Ina Garten Milk Chocolate Oreo Ice Cream Recipe
- Total Time: 35 minutes
- Yield: 6 1x
Description
Ina Garten’s milk chocolate Oreo ice cream delivers creamy indulgence with classic cookie crunch. Rich chocolate notes blend seamlessly with classic Oreo pieces, creating a luxurious dessert that invites cool comfort and sweet satisfaction.
Ingredients
Chocolate and Dairy:
- 1½ cups (360 ml) heavy cream
- 8 ounces (225 g) milk chocolate, such as Green & Black’s, finely chopped
- 1½ cups (360 ml) whole milk
- ¾ cup (150 g) sugar
- 4 extra-large egg yolks
Flavoring and Thickening Agents:
- 2 tablespoons (15 g) cocoa powder, such as Valrhona
- 1 teaspoon (5 ml) pure vanilla extract
- 2 teaspoons (10 ml) Cognac or brandy
- ½ teaspoon (3 g) kosher salt
- ½ teaspoon (1 g) cornstarch
Cookies:
- 2 cups (150 g) Oreo cookies, roughly chopped (15 cookies)
Instructions
- Create a double boiler by positioning a large heatproof bowl over a pan of gently simmering water, ensuring the bowl’s bottom doesn’t touch the water. Combine heavy cream and finely chopped milk chocolate in the bowl, melting slowly while stirring intermittently until smooth and glossy.
- Gently warm milk (240 milliliters or 8 fluid ounces), granulated sugar, and a pinch of salt in a medium saucepan over medium heat until hot but not boiling. In a separate mixing bowl, whisk egg yolks and cornstarch until well integrated and pale yellow.
- Temper the egg mixture by gradually streaming the hot milk into the yolks while continuously whisking. Pour the combined liquid back into the saucepan and cook over medium-low heat, stirring constantly to prevent scorching.
- Monitor the custard’s consistency carefully, cooking until it thickens to a smooth, velvety texture that coats the back of a wooden spoon. When you draw a finger across the spoon, it should leave a clear path without immediate liquid refilling.
- Remove the custard from heat and immediately strain through a fine-mesh sieve into the melted chocolate mixture. Incorporate vanilla extract, cocoa powder, and Cognac, whisking until perfectly uniform and silky.
- Rapidly cool the chocolate custard by placing the bowl over an ice bath or transferring to the refrigerator. Ensure the mixture is completely chilled before proceeding.
- Pour the cold mixture into an ice cream maker and churn according to the manufacturer’s instructions, typically 20-25 minutes until it reaches a soft-serve consistency.
- During the final minutes of churning, gradually introduce roughly chopped Oreo cookies, allowing them to distribute evenly throughout the ice cream.
- Transfer the freshly churned ice cream to a freezer-safe container, smoothing the surface with a spatula. Cover tightly and freeze for at least 4 hours or overnight until firm.
- Before serving, let the ice cream sit at room temperature for 3-5 minutes to soften slightly, making scooping easier and enhancing the creamy texture.
Notes
- Snag top-tier chocolate bars with at least 35% cocoa content for maximum richness and depth of flavor.
- Keep whisking the custard base constantly while heating to prevent scorching and create silky smooth textures.
- Chill the entire mixture thoroughly in the refrigerator for 4-6 hours before churning to guarantee perfect ice cream consistency.
- Crush Oreo cookies into small, uneven chunks right before adding them to maintain delightful crunch and textural contrast.
- Remove custard from heat immediately when it coats the back of a spoon to prevent accidental curdling or overheating.
- Prep Time: 20 minutes
- Cook Time: 15 minutes
- Category: Desserts, Snacks, Drinks
- Method: Blending
- Cuisine: American
Nutrition
- Serving Size: 1 cup (about 240 ml)
- Calories: 340
- Sugar: 28 g
- Sodium: 90 mg
- Fat: 22 g
- Saturated Fat: 13 g
- Carbohydrates: 35 g
- Fiber: 1 g
- Protein: 5 g
- Cholesterol: 100 mg
Isabella Rodriguez
Co-Founder & Content Creator
Expertise
Pastry Arts and Dessert Innovation, French and European Baking Techniques, Food Writing and Blogging, Culinary Event Planning
Education
Le Cordon Bleu Paris
Isabella Rodriguez is the co-founder and pastry chef at wd-50.com. She studied at Le Cordon Bleu in Paris, where she earned the Grand Diplôme®, a top award in both cooking and baking. After working in fancy bakeries and as a personal pastry chef, Isabella now shares her love for desserts in an easy way for home bakers to enjoy.
At wd-50.com, Isabella creates recipes for cookies, cakes, tarts, and more, always with clear steps and helpful tips. She believes baking should be fun, not stressful, and she hopes her recipes bring joy to your kitchen and smiles to your table.