Salt: Balances and intensifies overall flavor profile of the filling.
For Crust and Glaze:
Refrigerated Pie Crusts: Convenient shortcut for quick, flaky base that saves preparation time.
Flour for Rolling: Prevents dough from sticking and ensures smooth, even crust.
Powdered Sugar: Creates smooth, sweet glaze with glossy finish.
Milk: Helps thin powdered sugar into drizzle-able consistency for topping.
Equipment You’ll Need for Apple Slab Pie
Large mixing bowl: Perfect for combining sugar, flour, and spices with apples.
Measuring cups and spoons: Essential for accurate ingredient quantities.
Baking pan (15x10x1-inch): Key tool for creating the slab pie’s shape and size.
Rolling pin: Helps stretch and shape pie crust into a rectangle.
Whisk: Ideal for creating smooth, lump-free glaze.
Wire cooling rack: Allows pie to cool evenly and prevent soggy bottom.
Sharp knife: Useful for cutting pie into neat squares.
Small bowl: Handy for mixing glaze ingredients.
How to Bake a Yummy Apple Slab Pie
Oven Preparation Cozy kitchen warmth starts with heating your oven to a toasty 450°F, creating the perfect environment for baking magic.
Pastry Canvas Rolling out pie crusts into a beautiful rectangular landscape, gently pressing the dough into every corner of the baking pan with loving care.
Flavor Symphony Blending sweet spices and sugar into a fragrant mixture, gently tossing crisp apple slices until they’re perfectly coated with warm cinnamon and nutmeg notes.
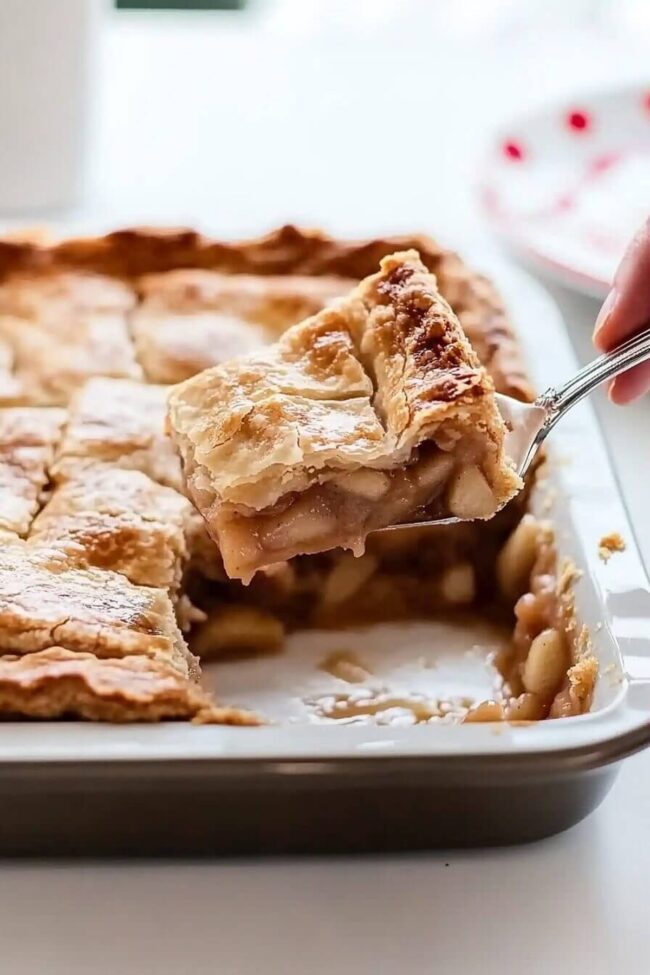
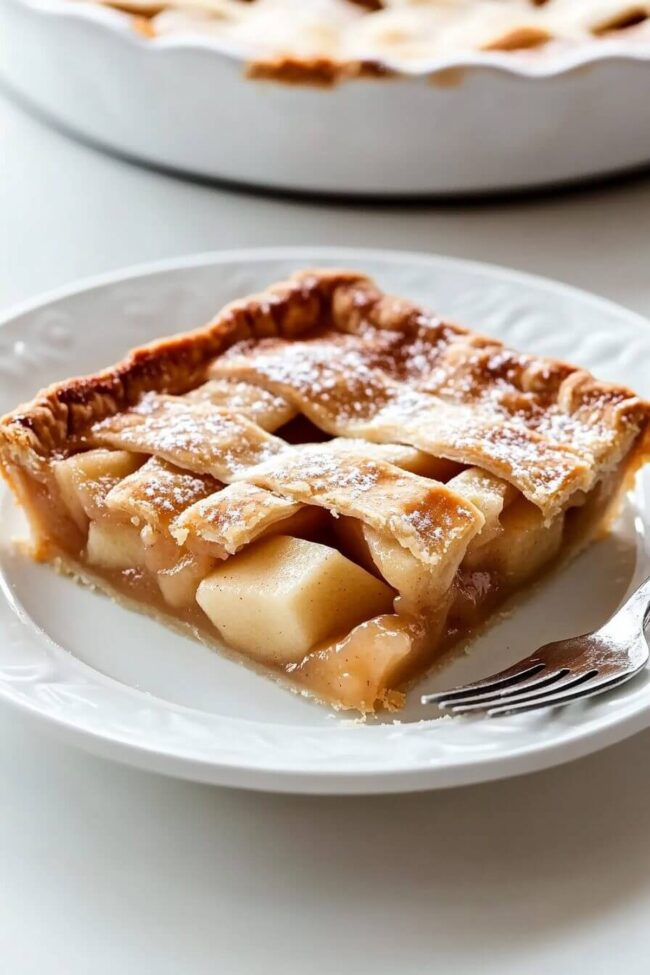
Pie Assembly Spreading the apple mixture across the pastry foundation, creating a rustic landscape of deliciousness that promises comfort and joy.
Baking Transformation Sliding the pan into the heated oven, watching as golden edges emerge and bubbling filling signals the pie’s readiness after 33-38 magical minutes.
Cooling Interlude Letting the pie rest on a wire rack, allowing flavors to settle and textures to harmonize while anticipation builds.
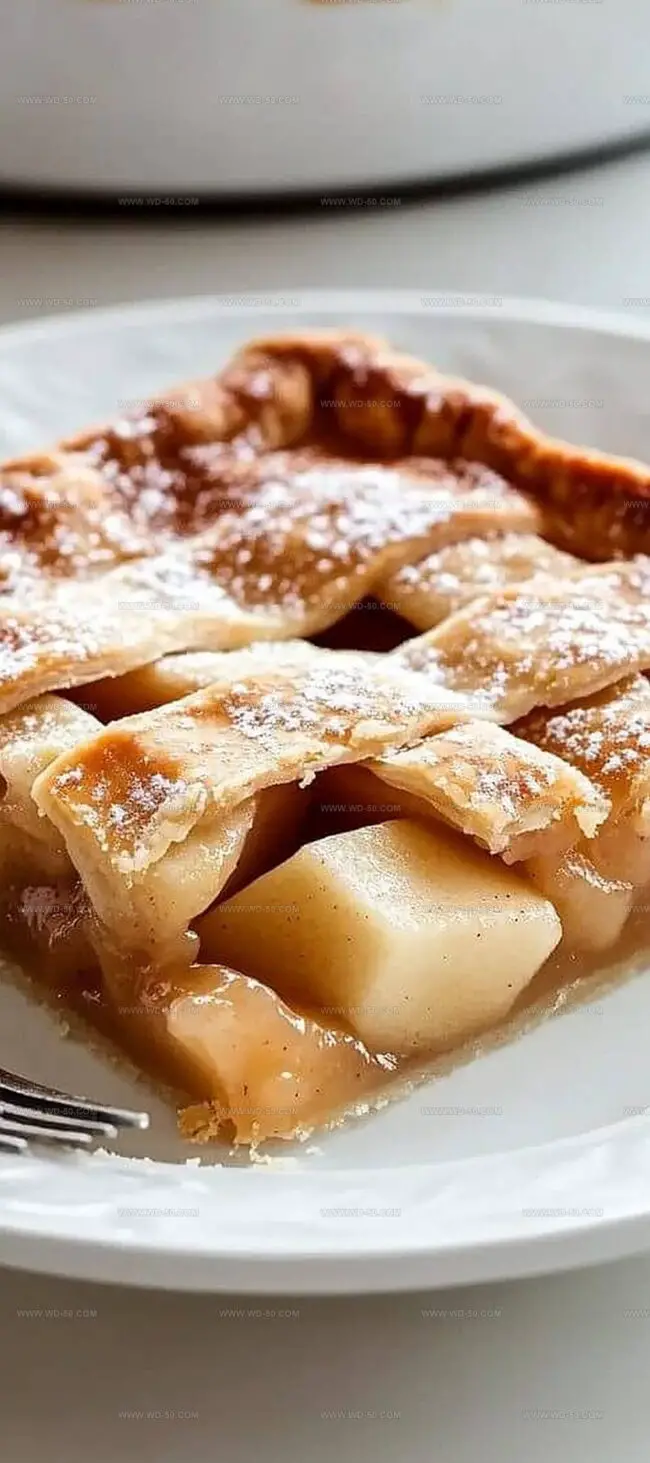
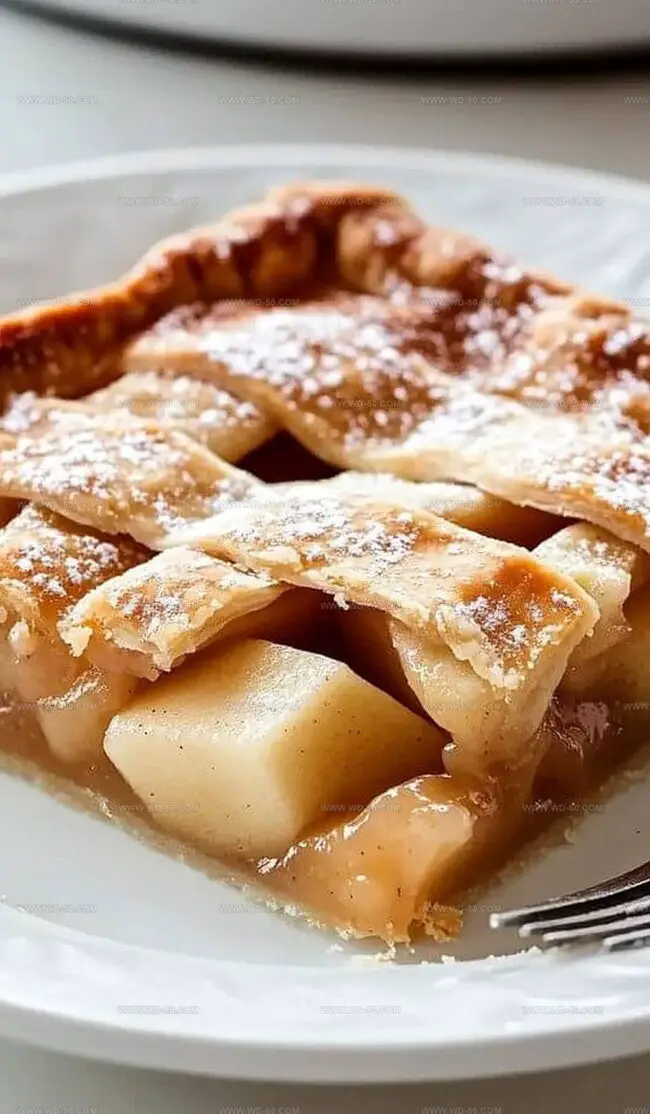
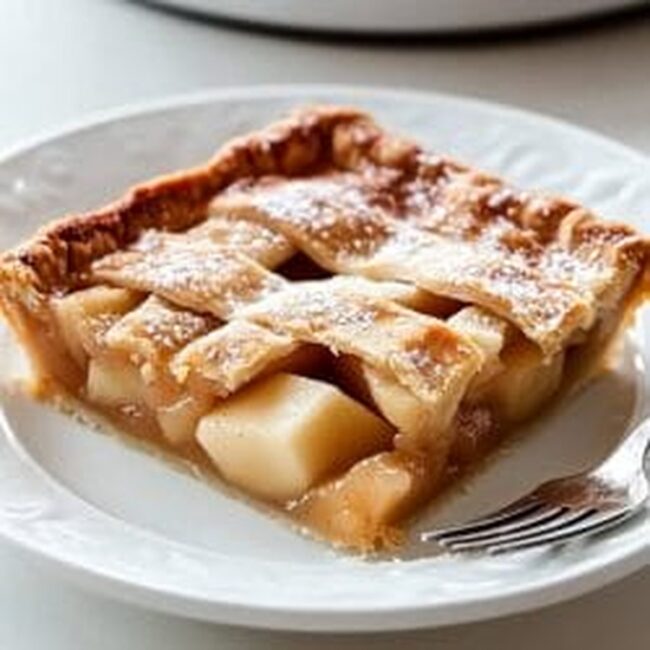
Sweet Finale Drizzling a silky glaze over the cooled pie, creating a beautiful finish that invites everyone to the dessert table.
Serving Pleasure Cutting into square portions, ready to be enjoyed with a scoop of creamy vanilla ice cream or a dollop of whipped cream.
Apple Slab Pie Tips and Flavor Tweaks
Choose crisp, tart varieties like Granny Smith or Honeycrisp for the best pie texture and balanced sweetness.
Prepare the entire pie up to 24 hours in advance and store covered at room temperature, ensuring maximum flavor development.
Brush the top crust with egg wash and sprinkle raw sugar for extra crunch and golden-brown shine.
Experiment with warming spices like cardamom or ginger to give the classic apple pie a unique flavor twist that’ll surprise your taste buds.
Keep leftover pie covered at room temperature for 2 days or refrigerate for up to 5 days, always reheating slices for a few minutes to restore that fresh-baked magic.
Serving Your Yummy Apple Slab Pie Beautifully
Cozy Autumn Gathering: Serve this slab pie during fall family reunions or weekend gatherings. Its rustic rectangular shape makes it perfect for casual buffet-style serving where guests can easily slice and enjoy.
Sweet Breakfast Companion: Transform breakfast into a delightful morning treat by pairing warm slices with freshly brewed coffee. The cinnamon and nutmeg spices complement morning beverages beautifully.
Dessert Presentation Perfection: Enhance visual appeal by garnishing each slice with a light dusting of powdered sugar or a sprinkle of chopped toasted walnuts. Place servings on vintage ceramic plates for an elegant touch that elevates the homemade dessert experience.
Versatile Temperature Option: Enjoy this apple slab pie warm straight from the oven or at room temperature. Each serving tastes equally delicious, making it convenient for different preferences and occasions.
Yummy Apple Slab Pie Storage and Prep Tips
Smart Storage Solutions: Keep leftover slices in an airtight container at room temperature for 2-3 days, ensuring maximum freshness and flavor retention.
Chilling Strategy: Refrigerate the apple slab pie for up to 5 days, covering loosely with plastic wrap to maintain its delightful texture and prevent moisture buildup.
Freezing Technique: Wrap individual slices or the entire pie in heavy-duty aluminum foil, then place in a freezer-safe bag. Frozen pie stays delicious for 2-3 months, perfect for future sweet cravings.
Reheating Magic: Warm refrigerated or thawed slices in a preheated oven at 350°F for 10-15 minutes to restore that just-baked crispness and bring out the apple’s warm, cozy flavors.
Grandma’s beloved apple slab pie delivers classic Midwestern comfort with buttery, flaky pastry and cinnamon-spiced fruit filling. Generous slices promise pure nostalgia and warmth for family gatherings and potluck celebrations you’ll treasure.
Preparation: Calibrate oven to 450°F (232°C) and arrange rack in the center position.
Dough Crafting: On a flour-dusted surface, merge two pie crusts and roll into a precise 17×12-inch rectangular shape, carefully transferring to a 15x10x1-inch baking pan. Tuck edges neatly, creating a clean perimeter.
Filling Composition: Whisk sugar, flour, cinnamon, nutmeg, and salt in a large bowl. Incorporate lemon juice and sliced apples, gently coating each piece to distribute the spiced mixture evenly.
Assembly: Layer the apple mixture across the prepared crust, ensuring uniform distribution and complete coverage of the pastry base.
Baking Process: Slide the pan into the preheated oven, baking for 33-38 minutes until the surface transforms to a rich golden-brown and filling begins to bubble enthusiastically.
Cooling and Finishing: Transfer the pie to a wire rack, allowing it to rest for 45 minutes. Create a silky glaze by blending powdered sugar and milk, then artfully drizzle over the cooled surface.
Serving: After the glaze sets for 30 minutes, slice into square portions. Offer warm or at room temperature, optionally accompanied by vanilla ice cream or freshly whipped cream.
Notes
Flour Surface Carefully: Dust work surface generously with flour to prevent dough from sticking and ensure smooth rolling.
Perfect Dough Technique: Stack pie crusts carefully and roll into precise rectangular shape to create even, professional-looking base.
Spice Coating Trick: Thoroughly coat apple slices with sugar-spice mixture before adding to pie for maximum flavor distribution.
Cooling Critical Step: Let pie rest for full 45 minutes to allow filling to set and prevent soggy bottom, ensuring perfect texture and slice presentation.
Founder, Head Recipe Developer & Cuisine Specialist
Expertise
Recipe Development and Testing, Modern American and European Cuisines, Food Styling and Photography, Culinary Education and Workshops
Education
Johnson & Wales University
Degree: Bachelor of Science in Culinary Arts
Focus: Comprehensive training in classical and modern cooking techniques, kitchen management, and global cuisines.
Auguste Escoffier School of Culinary Arts
Program: Diploma in Pastry Arts
Focus: Specialized education in baking and pastry, emphasizing artisanal bread, confections, and plated desserts.
Michael Reynolds is the founder and head recipe creator at wd-50.com. With over 15 years of experience in the kitchen, he’s spent time working in top restaurants and now focuses on making great food easy for everyone at home.
Michael studied culinary arts at Johnson & Wales University and later trained in pastry at the Auguste Escoffier School. He knows his way around both savory meals and sweet treats.
At wd-50.com, his goal is to help you feel confident in the kitchen, whether you’re trying something new or cooking a favorite dish. He loves using fresh ingredients and simple steps that still bring out big flavors.


Michael Reynolds
Founder, Head Recipe Developer & Cuisine Specialist
Expertise
Recipe Development and Testing, Modern American and European Cuisines, Food Styling and Photography, Culinary Education and Workshops
Education
Johnson & Wales University
Auguste Escoffier School of Culinary Arts
Michael Reynolds is the founder and head recipe creator at wd-50.com. With over 15 years of experience in the kitchen, he’s spent time working in top restaurants and now focuses on making great food easy for everyone at home.
Michael studied culinary arts at Johnson & Wales University and later trained in pastry at the Auguste Escoffier School. He knows his way around both savory meals and sweet treats.
At wd-50.com, his goal is to help you feel confident in the kitchen, whether you’re trying something new or cooking a favorite dish. He loves using fresh ingredients and simple steps that still bring out big flavors.