Rolling Pin (optional): Useful for shaping dough if preferred over hand-stretching.
Kitchen Towel: Covers dough during rising process.
How to Make Garlic Breadsticks with Cheese
Yeast Activation Combine warm water, sugar, and yeast in a mixing bowl. Let the mixture sit quietly until tiny bubbles start dancing on the surface, signaling the yeast is coming to life.
Liquid Fusion Add remaining water, olive oil, salt, and vinegar to the bubbly mixture. Mix thoroughly using a stand mixer or wooden spoon, gradually folding in flour until the dough begins to pull away from the bowl’s edges.
Dough Development Knead the mixture until smooth and slightly tacky. Cover and let it rest in a cozy spot, allowing the dough to expand and become pillowy soft.
Oven Preparation Heat the oven to a blazing 475°F. Position a pizza stone or baking sheet inside to create the perfect baking environment.
Dough Shaping Gently deflate the risen dough and spread it onto parchment paper. Stretch into a rectangular shape about one-third inch thick.
Flavor Infusion Create a magical garlic butter by melting butter and mixing with minced garlic. Brush this aromatic mixture generously across the dough’s surface.
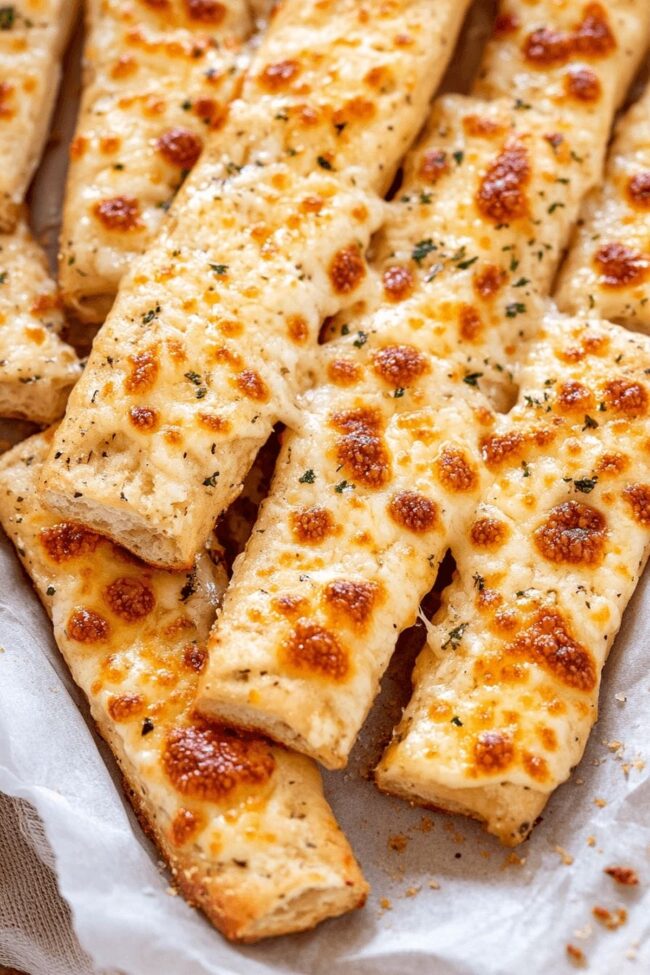
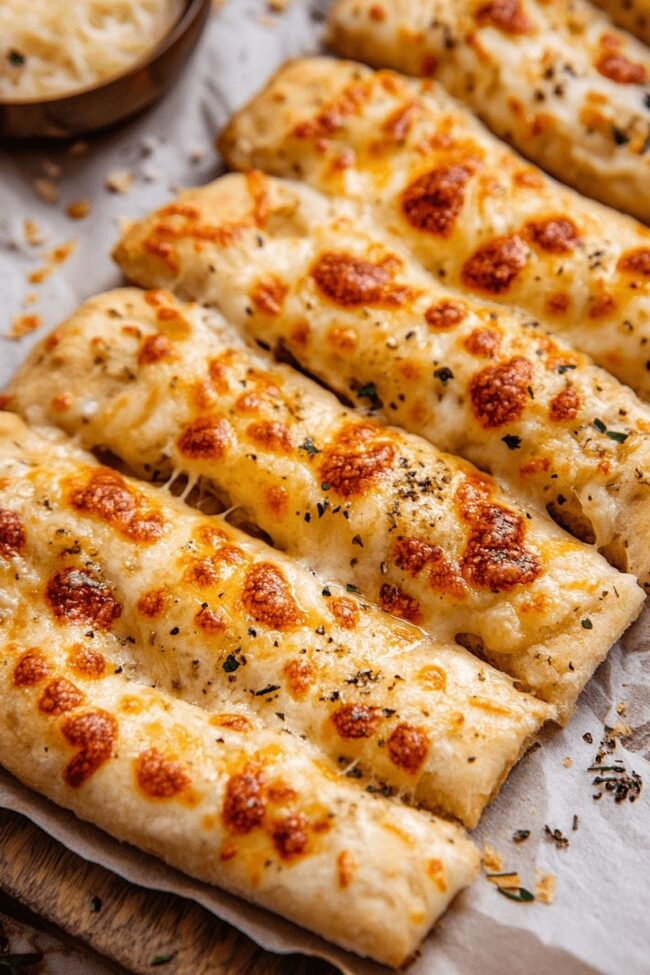
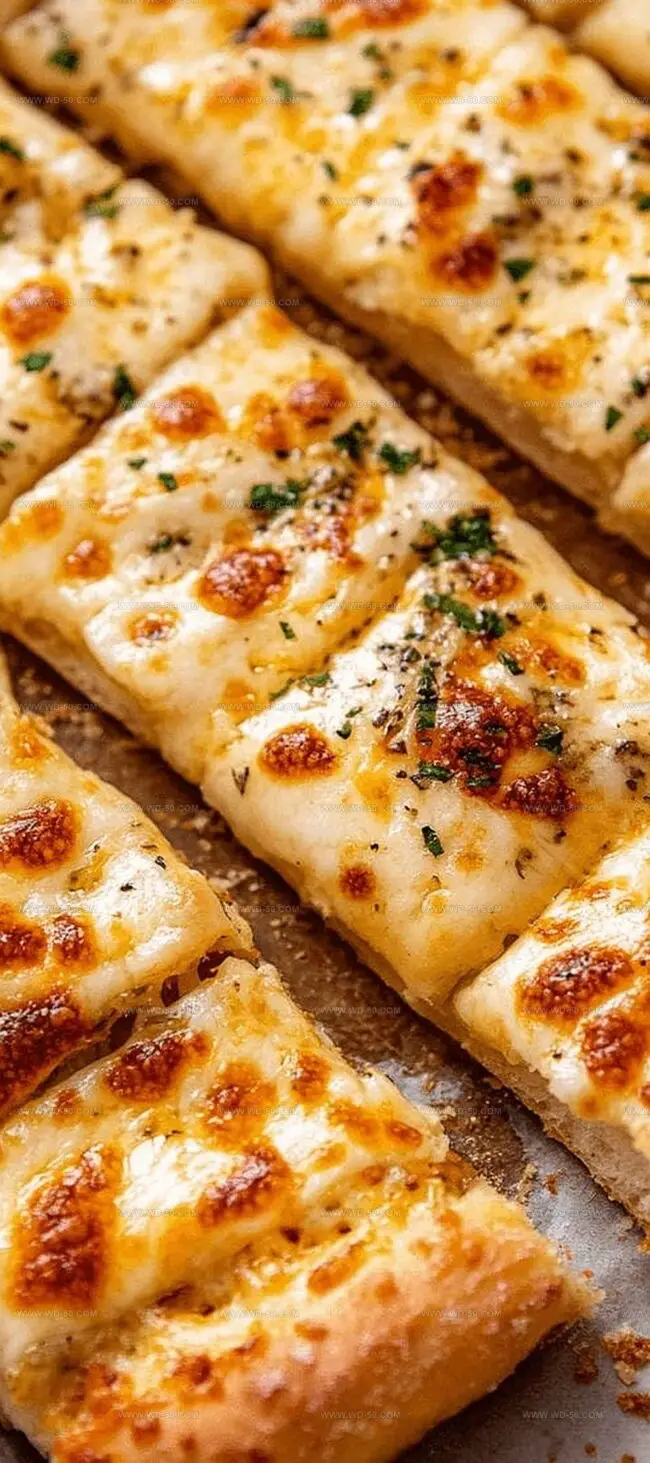
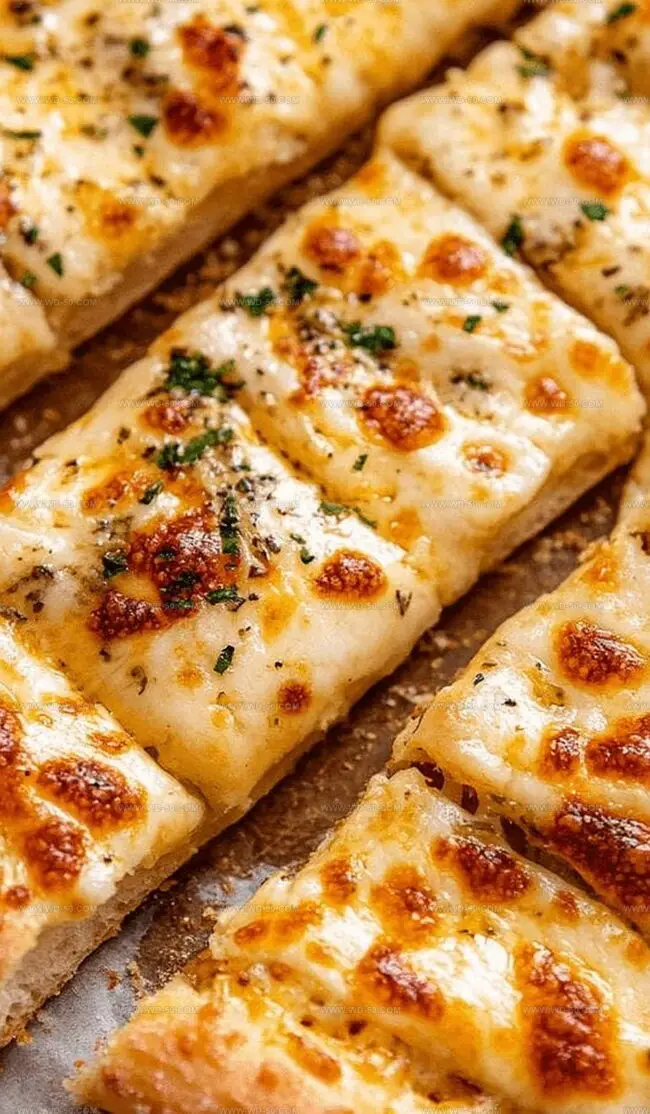
Cheese Transformation Scatter Parmesan and mozzarella cheeses over the garlic-kissed dough, ensuring an even, tantalizing coverage.
Baking Magic Slide the parchment with prepared breadsticks onto the preheated surface. Bake until the cheese becomes molten and turns a gorgeous golden-brown.
Serving Finale Remove the breadsticks from the oven and let them rest briefly. Slice and serve these irresistible cheesy delights to eager guests.
Tips for Golden Cheesy Breadstick
Swap white flour with whole wheat or gluten-free blend for different nutritional profiles and unique textures.
Experiment with different cheese combinations like sharp cheddar, gouda, or blue cheese to create exciting flavor variations.
Sprinkle dried herbs like oregano, basil, or Italian seasoning into the dough or on top for extra aromatic dimensions.
Lower oven temperature to 450°F if breadsticks brown too quickly, ensuring perfect golden color without burning edges.
Reheat breadsticks in a skillet with a touch of olive oil to restore crispiness and revive their fresh-baked appeal.
Serving Fresh Garlic Breadsticks with Meals
Crowd-Pleasing Party Platter: Arrange the cheesy garlic breadsticks on a rustic wooden board with small bowls of marinara sauce, ranch dressing, and garlic aioli for dipping. Guests can grab and enjoy these irresistible appetizers during game nights or casual gatherings.
Hearty Meal Companion: Pair these breadsticks alongside classic Italian dishes like spaghetti, lasagna, or chicken parmesan. Their garlicky, cheesy flavor complements rich pasta meals perfectly and adds a delightful crunch to your dinner plate.
Picnic Perfect Snack: Pack these breadsticks in a portable container for outdoor adventures. They’re great for picnics, beach trips, or road trips, providing a satisfying and flavorful snack that travels well and doesn’t require reheating.
Breakfast Twist: Break the breadsticks into smaller pieces and serve alongside scrambled eggs or use them as a base for a savory morning toast. The garlic and cheese combination brings an exciting breakfast upgrade that’ll wake up your taste buds.
Storage for Garlic Breadsticks with Cheese
Smart Storage Solutions
Refrigerator Refresh: Wrap leftover breadsticks tightly in aluminum foil or plastic wrap to maintain moisture and prevent drying. Store in refrigerator for up to 3 days, ensuring maximum flavor preservation.
Quick Reheat Magic: Revive cold breadsticks by placing them in preheated oven at 350°F for 3-5 minutes. Brush with extra garlic butter beforehand to restore original crispy texture and warm, aromatic appeal.
Freezer-Friendly Strategy: Slice cooled breadsticks into individual portions, then seal inside freezer-safe zip-lock bags. Freeze for up to one month, allowing convenient grab-and-reheat options during busy weeks.
Make-Ahead Convenience: Prepare dough in advance and refrigerate overnight for enhanced flavor development. Allow dough to reach room temperature before shaping and baking for best results.
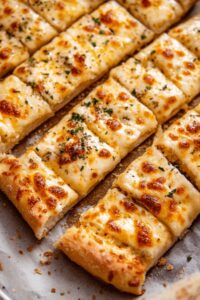
Rustic homemade cheesy garlic breadsticks deliver irresistible comfort with crisp edges and melted cheese. Italian-inspired delights will satisfy cravings and bring warmth to your table.
Ingredients
Scale
1 ½ cups (360 ml) bread flour or all-purpose flour
1 ⅖ cups (340 g) mozzarella cheese
½ cup (50 g) Parmesan cheese
½ cup (120 ml) warm water
1 tbsp (15 ml) olive oil
1 ½ tbsps (22 g) salted butter
½ tsp white vinegar
1 ½ tsps active dry yeast
1 tsp granulated sugar
½ tsp salt
2 cloves garlic
Instructions
Yeast Activation: Combine warm water, sugar, and active dry yeast in a large mixing bowl. Let the mixture rest until foamy bubbles surface, indicating yeast activation.
Dough Formation: Add remaining water, olive oil, salt, and white vinegar to the yeast mixture. Gradually incorporate flour using a stand mixer or wooden spoon until the dough cleanly separates from the bowl’s sides.
Dough Preparation: Knead the dough to achieve a smooth, slightly tacky consistency. Transfer to an oiled bowl, cover, and allow to proof in a warm location until doubled in volume.
Oven Preparation: Position a pizza stone or inverted baking sheet on the oven rack. Preheat the oven to 246 degrees Celsius (475 degrees Fahrenheit).
Dough Shaping and Seasoning: Deflate the risen dough and stretch onto parchment paper, forming a rectangular shape. Create garlic butter by melting butter and mixing with finely chopped garlic. Brush the entire dough surface thoroughly with the garlic butter.
Cheese Application: Generously sprinkle Parmesan cheese across the dough, followed by an even layer of shredded mozzarella, ensuring complete surface coverage.
Baking Process: Slide the parchment with prepared breadsticks onto the preheated pizza stone or baking sheet. Bake for 8-12 minutes until the cheese melts and turns golden-brown.
Serving: Remove breadsticks from the oven and let cool briefly. Slice into desired portions and serve while warm and crispy.
Notes
Activate Yeast Precisely: Water temperature between 110-115°F ensures proper yeast activation without killing the microorganisms, resulting in better dough rise.
Control Dough Consistency: Slightly tacky dough indicates perfect hydration; avoid adding too much flour to maintain softness and prevent dry breadsticks.
Optimize Proofing Environment: Place dough in a warm, draft-free area like near a preheated oven or inside a turned-off oven with pilot light to encourage consistent rising.
Cheese Melting Technique: Use freshly grated cheese for even melting and better flavor distribution, avoiding pre-shredded varieties that contain anti-caking agents preventing smooth melting.
Founder, Head Recipe Developer & Cuisine Specialist
Expertise
Recipe Development and Testing, Modern American and European Cuisines, Food Styling and Photography, Culinary Education and Workshops
Education
Johnson & Wales University
Degree: Bachelor of Science in Culinary Arts
Focus: Comprehensive training in classical and modern cooking techniques, kitchen management, and global cuisines.
Auguste Escoffier School of Culinary Arts
Program: Diploma in Pastry Arts
Focus: Specialized education in baking and pastry, emphasizing artisanal bread, confections, and plated desserts.
Michael Reynolds is the founder and head recipe creator at wd-50.com. With over 15 years of experience in the kitchen, he’s spent time working in top restaurants and now focuses on making great food easy for everyone at home.
Michael studied culinary arts at Johnson & Wales University and later trained in pastry at the Auguste Escoffier School. He knows his way around both savory meals and sweet treats.
At wd-50.com, his goal is to help you feel confident in the kitchen, whether you’re trying something new or cooking a favorite dish. He loves using fresh ingredients and simple steps that still bring out big flavors.


Michael Reynolds
Founder, Head Recipe Developer & Cuisine Specialist
Expertise
Recipe Development and Testing, Modern American and European Cuisines, Food Styling and Photography, Culinary Education and Workshops
Education
Johnson & Wales University
Auguste Escoffier School of Culinary Arts
Michael Reynolds is the founder and head recipe creator at wd-50.com. With over 15 years of experience in the kitchen, he’s spent time working in top restaurants and now focuses on making great food easy for everyone at home.
Michael studied culinary arts at Johnson & Wales University and later trained in pastry at the Auguste Escoffier School. He knows his way around both savory meals and sweet treats.
At wd-50.com, his goal is to help you feel confident in the kitchen, whether you’re trying something new or cooking a favorite dish. He loves using fresh ingredients and simple steps that still bring out big flavors.