Quick & Creamy Jamie Oliver Marble Cake Recipe for Sweet Fans
Jamie Oliver’s marble cake transforms ordinary baking into a delightful culinary adventure that captures imagination and taste buds.
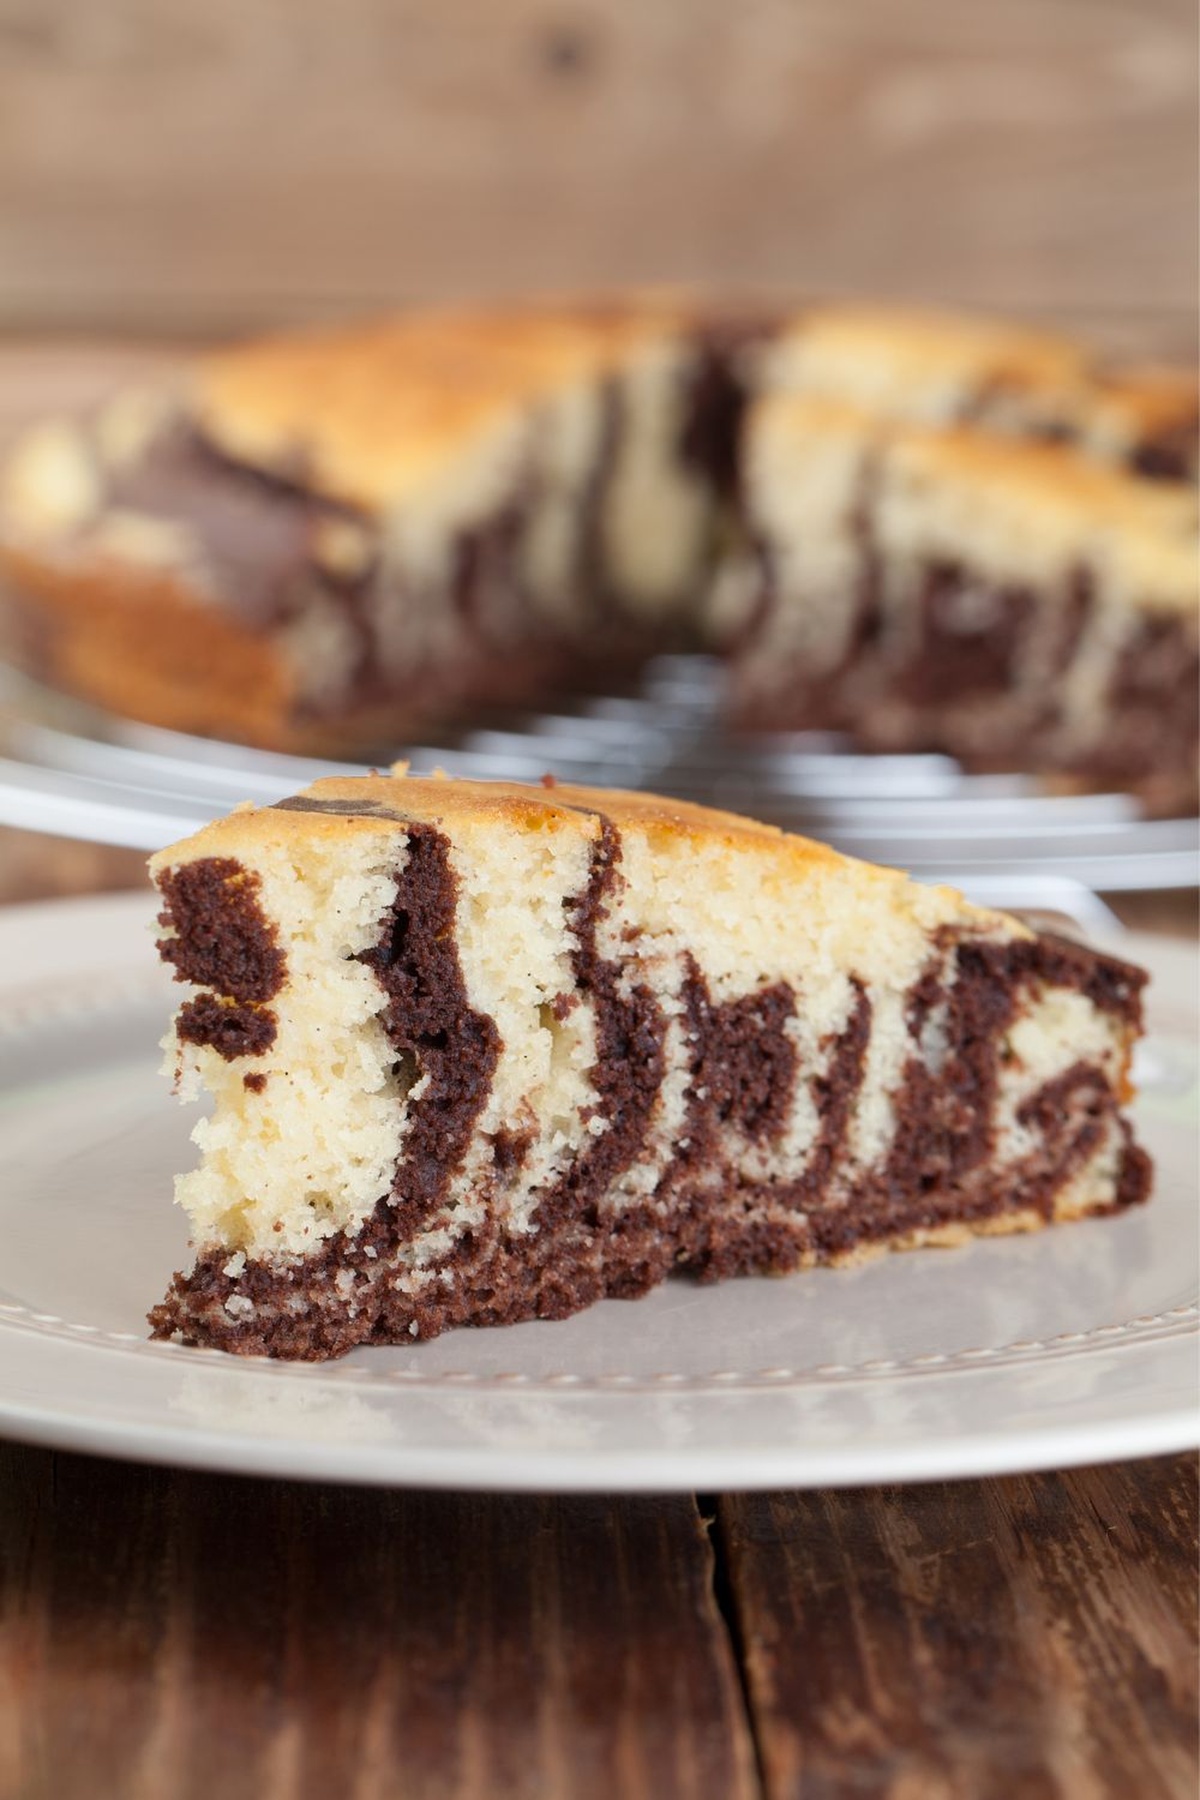
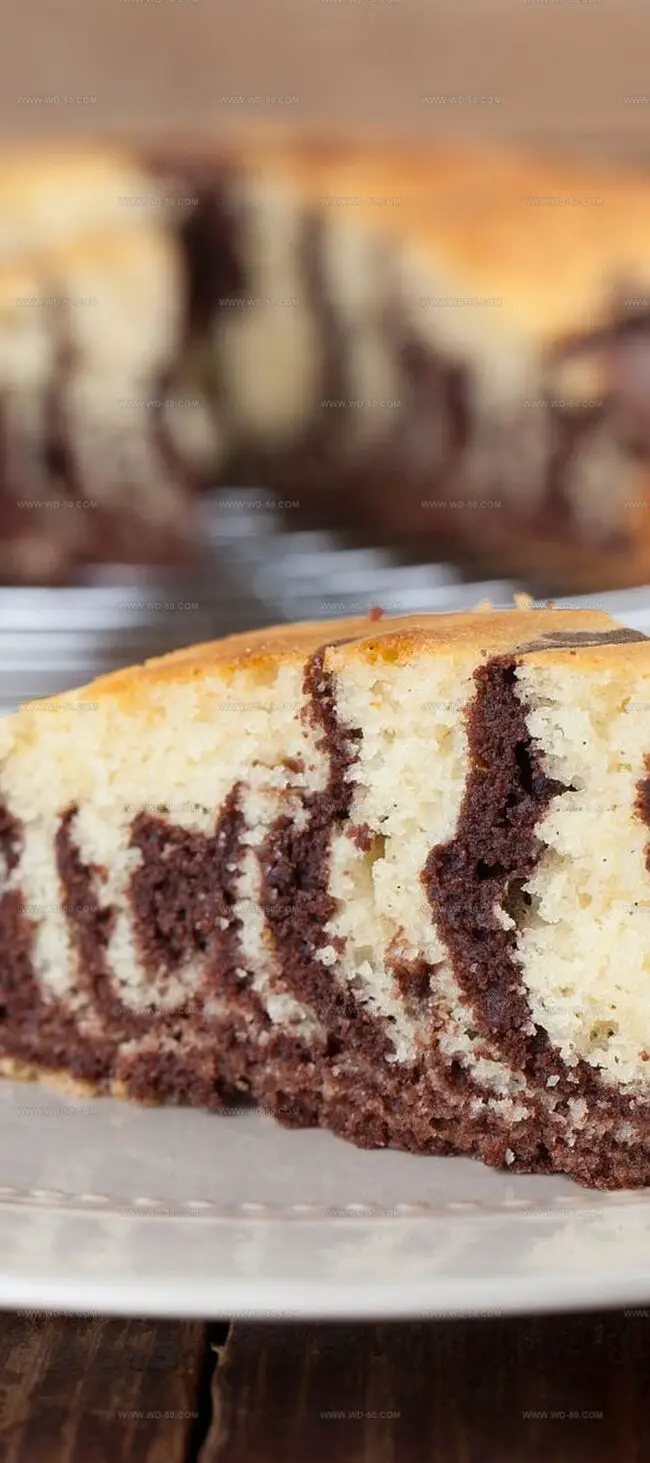
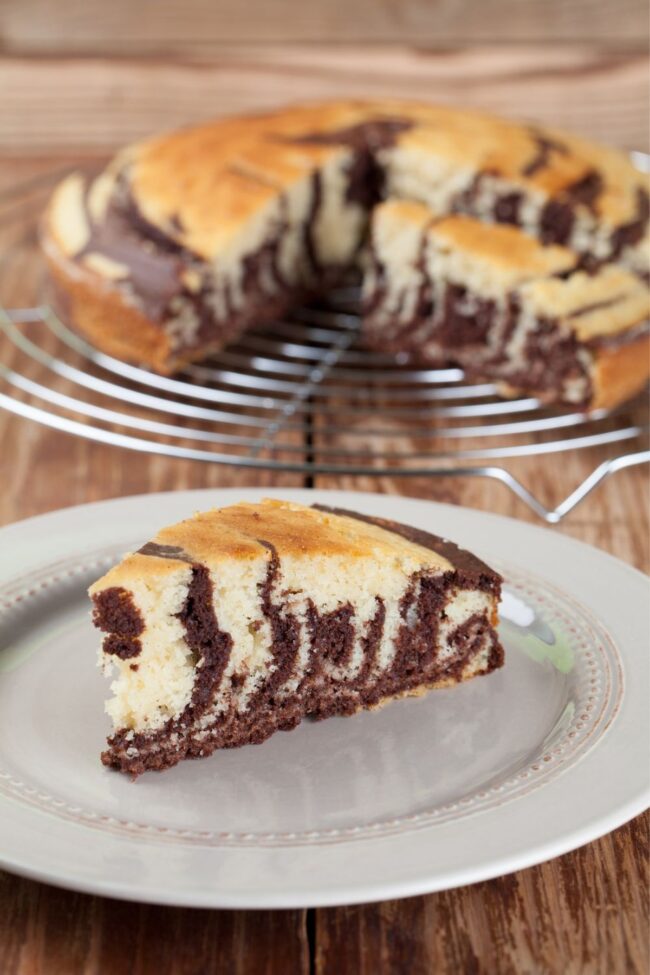
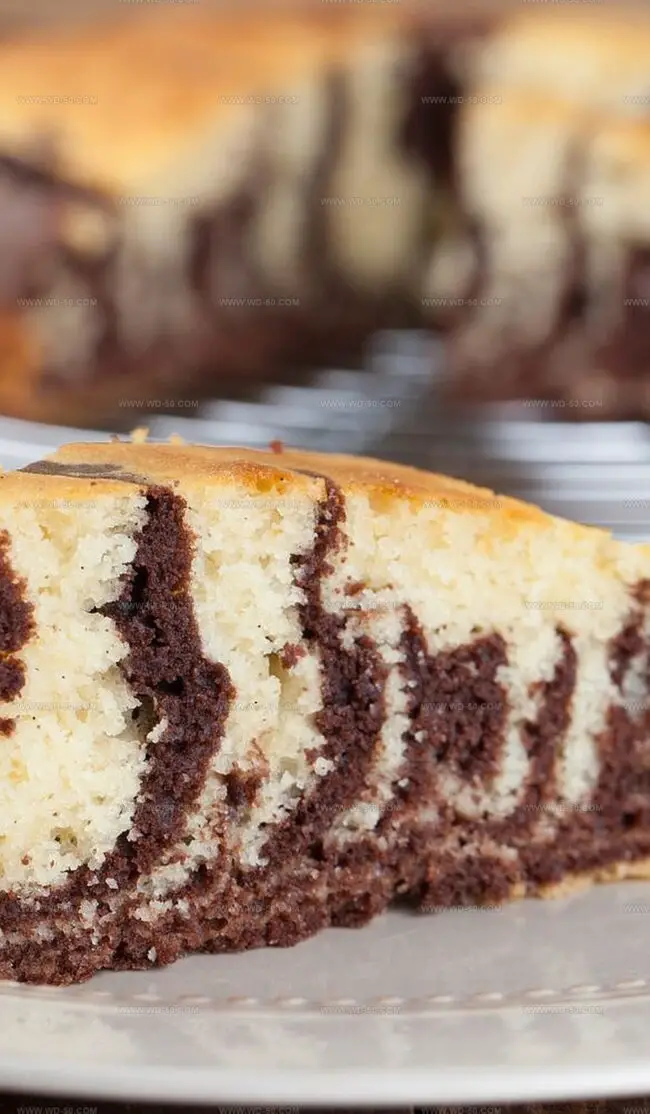
Sweet swirls of chocolate and vanilla dance together, creating a mesmerizing pattern inside a single, irresistible dessert.
Each slice reveals an artistic blend of contrasting colors and flavors that promises pure delight.
Rich ingredients harmonize beautifully, producing a tender, moist texture that melts in your mouth.
Home bakers adore this recipe for its simplicity and stunning visual appeal.
Weekend gatherings deserve something special, and this marble cake delivers excitement and comfort in equal measure.
Prepare to impress your friends and family with a show-stopping dessert that looks as incredible as it tastes: pure magic awaits.
Why Jamie Oliver’s Marble Cake Recipe Catches the Eye
Gathering Ingredients for Jamie Oliver’s Marble Cake
Main Ingredients:
Cake Base:Chocolate Component:Baking Essentials:Baking Steps for Jamie Oliver’s Marble Cake
Step 1: Prepare Your Oven and Baking Tin
Preheat the oven to 180°C (350°F) for standard ovens or 160°C (320°F) for fan ovens. Grease a 20cm round cake tin and line the bottom with a circle of baking paper.
Step 2: Create Cake Batter
Gather your ingredients:Combine all ingredients in a mixing bowl or blender. Mix until you have a smooth, creamy batter. If mixing by hand, use a wooden spoon and mix thoroughly.
Step 3: Separate and Color the Batter
Divide the prepared batter equally into two separate mixing bowls.
Step 4: Add Chocolate Flavor
In one bowl, mix in of cocoa powder to create a rich chocolate batter. Stir until the cocoa is completely incorporated.
Step 5: Layer the Batter
Use two spoons to alternate dropping spoonfuls of vanilla and chocolate batters into the prepared cake tin. Create random, uneven layers for a natural marble effect.
Step 6: Remove Air Bubbles
Gently tap the cake tin on the kitchen counter 2-3 times to help release any trapped air bubbles in the batter.
Step 7: Create Marble Pattern
Take a skewer or thin knife and drag it through the batter in gentle, swirling motions. Create a random pattern by moving the skewer in different directions.
Step 8: Bake the Cake
Place the cake tin in the preheated oven. Bake for 45-55 minutes. To check doneness, insert a clean skewer into the center of the cake. If it comes out clean with no wet batter, the cake is ready.
Step 9: Cool and Serve
Remove the cake from the oven and let it cool in the tin for 10 minutes. Then transfer to a wire rack to cool completely before slicing and serving.
Tips to Perfect Jamie Oliver Marble Cake
Storing Jamie Oliver’s Marble Cake
Various Takes on Jamie Oliver’s Marble Cake Recipe
A Word on Jamie Oliver’s Marble Cake Recipe
Marble cake masterpieces emerge from kitchen adventures with Jamie Oliver’s classic recipe.
Chocolate and vanilla swirls dance across each delectable slice, promising sensory delight.
Kitchen magic happens when contrasting batters intertwine, creating mesmerizing patterns.
Classic techniques blend seamlessly with modern baking approaches in this timeless dessert.
Bakers can explore creative possibilities while honoring traditional cake-making principles.
Sweet symphonies await when passionate chefs embrace this delightful recipe – so snap a photo, share the deliciousness on social media, and inspire fellow baking enthusiasts to create their own marbled magic!
Print
Jamie Oliver Marble Cake Recipe
- Total Time: 1 hour 10 minutes
- Yield: 8 1x
Description
Jamie Oliver’s marble cake swirls chocolate and vanilla batters into a mesmerizing dessert that delights with each slice. Rich layers of contrasting flavors dance together, promising a delectable experience that will charm family and friends at any gathering.
Ingredients
Main Ingredients:
- 225 grams (8 ounces) butter, softened
- 225 grams (8 ounces) caster sugar
- 4 eggs
- 225 grams (8 ounces) self-raising flour
Flavor Enhancers:
- 3 tablespoons milk
- 1 teaspoon vanilla extract
Coloring/Flavoring:
- 2 tablespoons cocoa powder
Instructions
- Prepare the baking environment by heating the oven to 180°C (356°F) for standard ovens or 160°C (320°F) for fan-assisted ovens, equivalent to gas mark 4. Thoroughly grease a 20-centimeter (8-inch) round cake tin and line the base with a precisely cut circular piece of parchment paper.
- Create a smooth, homogeneous batter by combining softened butter, granulated sugar, eggs, all-purpose flour, whole milk, and pure vanilla extract. Use an electric blender for optimal consistency, or alternatively, whisk thoroughly by hand with a wooden spoon until the mixture is uniform and free of lumps.
- Divide the prepared batter evenly between two separate mixing bowls, ensuring equal distribution for consistent flavor layering.
- Transform one portion of the batter into a chocolate variant by incorporating unsweetened cocoa powder, stirring until the color and texture are completely integrated.
- Construct the marble effect by strategically depositing alternating spoonfuls of vanilla and chocolate batters into the prepared cake tin, creating a random yet deliberate pattern.
- Eliminate potential air pockets by gently tapping the filled cake tin against the kitchen counter, which helps settle the batter and prevent potential uneven baking.
- Develop the signature marble design by carefully dragging a thin skewer or knife through the layered batters, creating intricate swirls without overmixing.
- Position the cake tin in the preheated oven and bake for 45 to 55 minutes. Test the cake’s doneness by inserting a clean skewer or toothpick into the center; it should emerge without any raw batter clinging to it, indicating the cake is fully baked.
Notes
- Swirl batters gently with a skewer to create mesmerizing marble patterns without overworking the mixture.
- Room temperature eggs and butter blend more smoothly, guaranteeing a tender, uniform cake texture.
- Tapping the baking tin before placing in the oven helps eliminate air pockets that might disrupt the cake’s beautiful appearance.
- Moisture stays locked in when storing the cake in an airtight container at room temperature for several days.
- Elevate each slice with a sprinkle of powdered sugar or a creamy dollop of whipped cream for an indulgent touch.
- Prep Time: 15 minutes
- Cook Time: 55 minutes
- Category: Desserts, Snacks
- Method: Baking
- Cuisine: American
Nutrition
- Serving Size: 8
- Calories: 380 kcal
- Sugar: 28 g
- Sodium: 120 mg
- Fat: 20 g
- Saturated Fat: 12 g
- Unsaturated Fat: 8 g
- Trans Fat: 0 g
- Carbohydrates: 44 g
- Fiber: 1 g
- Protein: 5 g
- Cholesterol: 70 mg
Isabella Rodriguez
Co-Founder & Content Creator
Expertise
Pastry Arts and Dessert Innovation, French and European Baking Techniques, Food Writing and Blogging, Culinary Event Planning
Education
Le Cordon Bleu Paris
Isabella Rodriguez is the co-founder and pastry chef at wd-50.com. She studied at Le Cordon Bleu in Paris, where she earned the Grand Diplôme®, a top award in both cooking and baking. After working in fancy bakeries and as a personal pastry chef, Isabella now shares her love for desserts in an easy way for home bakers to enjoy.
At wd-50.com, Isabella creates recipes for cookies, cakes, tarts, and more, always with clear steps and helpful tips. She believes baking should be fun, not stressful, and she hopes her recipes bring joy to your kitchen and smiles to your table.